Your smart home is only as good as the wireless protocol that chains all your devices together. We’ve all been there: you add one more smart bulb or a budget-friendly Wi-Fi camera, and suddenly your Netflix stream starts buffering, or worse, your smart hub becomes unresponsive. It’s a classic case of "too many cooks in the kitchen," where your high-performance laptop is fighting for bandwidth with a toaster that only needs to send three kilobytes of data a day.
Fortunately, building a VLAN (Virtual Local Area Network) doesn't require ripping open your walls or running extra wires; it is simply digital housekeeping. By segmenting your network, you ensure that your sensitive personal data is physically—or rather, virtually—separated from your IoT gadgets. If a smart plug is hacked, the damage is contained. In this guide, I’ll walk you through how to restore balance to your home network and lock down your privacy for good.
What is a Smart Home VLAN and Why Do You Need One?
A VLAN is a virtualized segment of your network that separates IoT devices like smart bulbs, cameras, and sensors from your main hardware, such as your personal computers, NAS (Network Attached Storage), and smartphones. Think of your home network as a single-lane highway. When you have 30+ smart devices, that highway becomes congested with slow-moving traffic. A VLAN allows you to build a dedicated "HOV lane" for your most important data while relegating the "tractor" traffic of IoT devices to their own side road.
Most home networks are "flat." This means every device—from your work laptop to that generic $10 smart LED strip—can "see" and talk to every other device. This is the "Flat Network" risk. If a vulnerability is discovered in a low-cost smart device, a hacker can use it as a pivot point to move laterally across your network. Once they are "in," they can scan your PC for open folders or attempt to intercept unencrypted traffic.

The Benefits: Security and Performance by the Numbers
Isolating your smart home isn't just a paranoid security measure; it’s a performance optimization strategy. When you segment your network, you are essentially reducing the "broadcast domain." Devices often send out "shouts" to see who else is on the network. In a flat network with 50 devices, those shouts create significant overhead.
Research and real-world network testing show that implementing network segmentation via VLANs can reduce device-to-device interference by up to 40% in households with more than 20 connected smart devices. This leads to snappier response times for your voice assistants and fewer "Device Offline" errors in your smart home apps.
From a security standpoint, the impact is even more dramatic. Isolating IoT traffic on a dedicated VLAN layer can lower the risk of lateral network exploitation by 95%. By creating a virtual barrier, you effectively contain potential breaches to the virtual segment, ensuring that even if an attacker gains control of a smart camera, they cannot access your sensitive tax documents or private photo backups.
| Feature | Flat Network (Standard) | Segmented Network (VLAN) |
|---|---|---|
| Security Risk | High (Lateral movement possible) | Low (Isolated segments) |
| Network Traffic | Congested (All devices compete) | Optimized (IoT on dedicated lane) |
| Broadcast Noise | High (Constant device "shouts") | Minimal (Contained within VLAN) |
| Privacy | Low (IoT can "see" your PC) | High (IoT is blinded to personal data) |

Prerequisites: Checking Your Hardware Compatibility
Before we dive into the settings, we need to ensure your gear is up to the task. Not every router bought at a big-box store supports VLANs. Most entry-level "plug-and-play" routers offer a "Guest Network," which is a primitive form of a VLAN, but for a truly seamless smart home, you’ll want something more robust.
The Hardware Checklist:
- A VLAN-capable Router: Look for brands like Ubiquiti (UniFi), TP-Link (Omada), MikroTik, or prosumer brands like Synology and ASUS (Pro models).
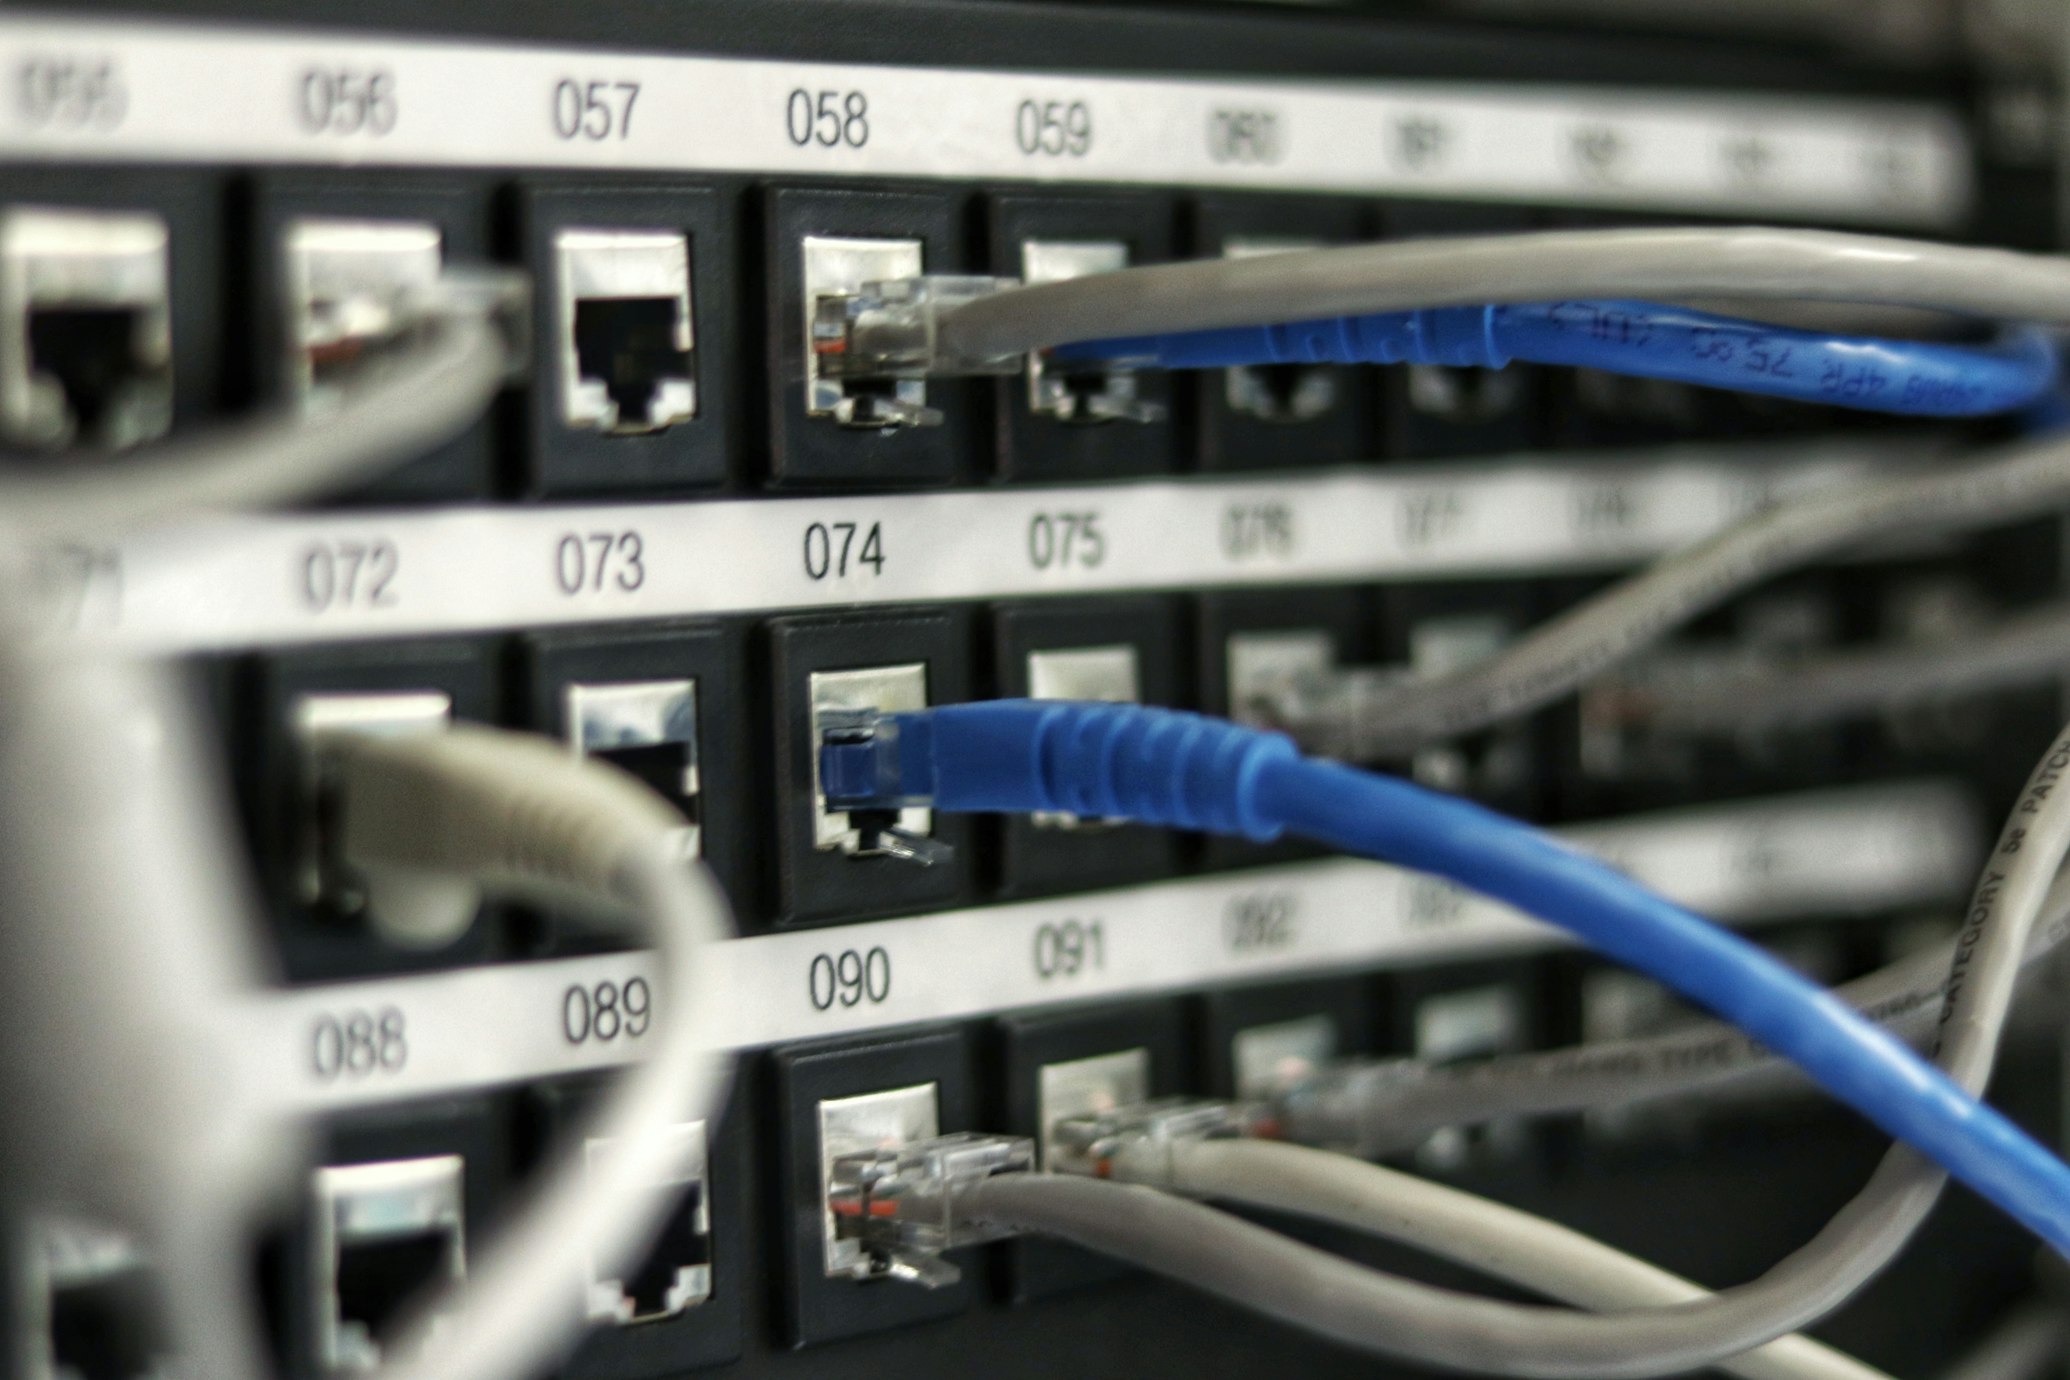
- Managed Switches: If you have hardwired IoT devices (like security cameras or hubs), your switches must also support 802.1Q tagging to pass the VLAN info through.
- Access Points (Optional): If you use standalone Wi-Fi points, they must be able to broadcast multiple SSIDs and map them to specific VLAN IDs.
If your router doesn't explicitly mention "VLAN" or "Network Segmentation," check if it supports third-party firmware like OpenWRT or DD-WRT. However, for most of my readers, upgrading to a prosumer ecosystem like UniFi is the best investment for long-term smart home stability.
Step 1: Accessing Your Router's Admin Interface
To start, you need to get under the hood of your gateway. This is done by identifying your gateway IP address—usually 192.168.1.1 or 192.168.0.1.
- Open your web browser and type your router's IP address into the URL bar.
- Log in with your administrator credentials. (If you’ve never changed these, please do so immediately—"admin/admin" is a massive security hole).
- Navigate to the Advanced Settings, LAN, or Network Segmentation tab.
In modern interfaces like the UniFi Network Controller, you’ll find this under Settings > Network. In TP-Link Omada, it’s under Settings > Wired Networks > LAN.
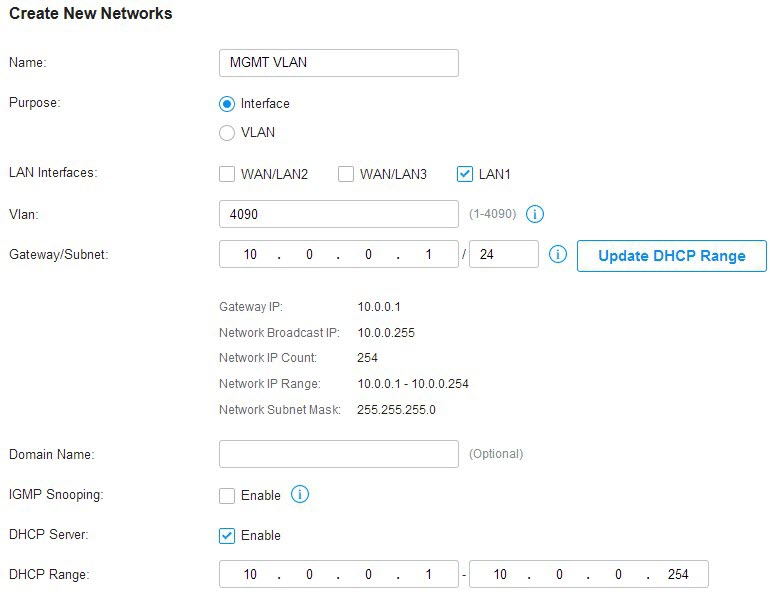
Step 2: Creating the Virtual Network ID (VLAN ID)
Now we create the "side road." You need to assign a unique ID (the VLAN Tag) and a specific IP range.
- VLAN ID: This is a number between 2 and 4094. I usually recommend using something memorable like
10or20. - Name: Label it clearly, such as "IoT_VLAN."
- Subnet/IP Range: Your main network might be
192.168.1.x. For your IoT VLAN, set it to something different like192.168.20.1/24. This ensures that even the IP addresses look different, making it easier to manage and identify devices later.
Once you hit "Apply," the router creates a virtual interface. At this stage, the network exists, but nothing is connected to it yet.
Step 3: Configuring SSID and Isolation Settings
Most smart home devices operate on the 2.4GHz band because it has better range through walls. We are going to create a dedicated Wi-Fi name (SSID) just for these devices.
- Create a New Wi-Fi Network: Name it something like "SmartHome_IoT."
- Map to VLAN: In the Wi-Fi settings, look for an option to "Associate VLAN" and select the ID you created in Step 2.
- Enable Device Isolation: If your router has a checkbox for "L2 Isolation" or "Guest Policy," check it. This prevents the smart bulbs from talking to each other, further hardening your security.
Jessica’s Tip: Use a strong, unique password for this SSID. Don't use the same password as your main Wi-Fi, as that defeats the purpose of segmentation if a guest or an intruder gets a hold of it.
Step 4: Firewall Rules – The Final Security Layer
Creating the VLAN is only half the battle. By default, many routers will still allow traffic to flow between VLANs. We need to write the "laws" that govern who can talk to whom.
Recommended Firewall Logic:
- Rule 1: Allow Established/Related Traffic. This allows your main computer to "talk" to a smart device and receive a reply, but the smart device cannot initiate a conversation with your computer first.
- Rule 2: Block IoT to Main LAN. This is the "Wall." It ensures that any device on the
192.168.20.xrange is strictly forbidden from reaching the192.168.1.xrange. - Rule 3: (Optional) Block IoT to Router Admin. Prevent your smart devices from even seeing the login page of your router.
Pro-Tip: The mDNS Headache If you use HomeKit, Google Home, or Chromecast, you might find that your phone (on the Main LAN) can't "see" the devices on the IoT VLAN. To fix this, enable mDNS (Multicast DNS) or an mDNS Reflector in your router settings. This allows the discovery "shouts" to pass through the firewall without compromising the actual data security.
Step 5: Migrating and Testing Your Devices
It’s time for the move. This is the most tedious part, as you’ll need to reset your smart bulbs, plugs, and cameras to join the new "SmartHome_IoT" SSID.
Prioritize your migration by value:
- High-Risk Devices: Start with generic Wi-Fi cameras and no-name smart plugs from overseas manufacturers.
- Bandwidth Hogs: Move smart TVs and streaming sticks next.
- Low-Traffic Sensors: Move your bridge-based systems (like Philips Hue or Aqara hubs) last.
Once migrated, test the isolation. Try to "Ping" your laptop’s IP address from a device connected to the IoT VLAN (if you have a way to run a command line on it) or use a network scanning app like Fing while connected to the IoT Wi-Fi. If you can’t see your main computer or NAS, congratulations—your firewall rules are working.
Advanced Best Practices for 2026
As we move toward a more connected future, the "Zero-Trust" model is becoming the gold standard. In this model, you assume no device is safe.
- The Principle of Least Privilege: Only give a device the access it absolutely needs. If a smart sprinkler only needs to check the weather, block it from accessing anything else on your local network entirely.
- Regular Auditing: Every six months, log into your router and check the "Client List." If you see a device you don't recognize, block it.
- Firmware is King: Even on an isolated VLAN, a compromised device can still be used for DDoS attacks or crypto-mining. Keep your IoT firmware updated to close known loopholes.
FAQ
Q: Will a VLAN make my smart home slower? Actually, the opposite is usually true. By separating the high-frequency "chatter" of IoT devices from your main data stream, your main devices (laptops, gaming consoles) often see a decrease in latency and fewer interference issues.
Q: Do I need a separate VLAN for every brand of device? No, that would be overkill and very difficult to manage. One dedicated "IoT VLAN" is sufficient for most homes. However, some power users prefer a separate "Camera VLAN" for high-bandwidth video traffic and a "No-Internet VLAN" for devices that only need local control.
Q: Can I set up a VLAN on a standard ISP-provided router? Typically, no. Most routers provided by ISPs are locked down to basic features. If you are serious about smart home security, I highly recommend putting your ISP router into "Bridge Mode" and using your own VLAN-capable router.
Setting up a VLAN is a significant milestone in your journey from a "smart home hobbyist" to a "smart home pro." It provides the peace of mind that your digital life is protected by more than just a Wi-Fi password. By taking the time to segment your network today, you’re building a foundation that is faster, more secure, and ready for whatever new tech 2026 brings to your doorstep.