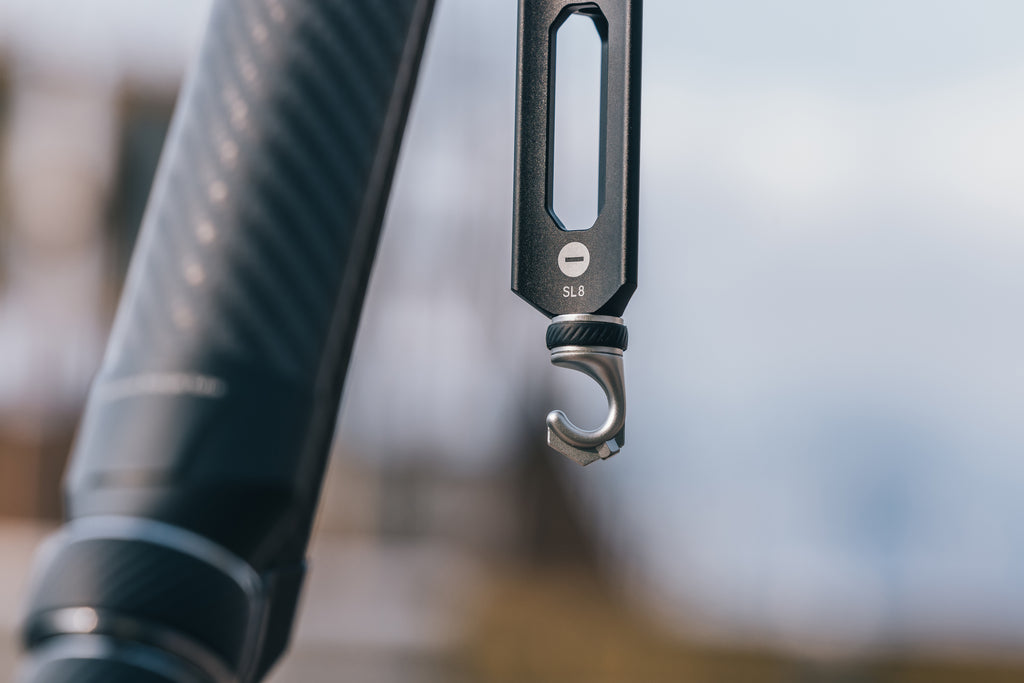
I’ve spent more nights than I can count shivering on windswept ridges from the Patagonian Highlands to the jagged peaks of the Cascades, waiting for that one perfect frame. If there’s one thing I’ve learned about outdoor photography, it’s that nature doesn't care about your expensive gear. A sudden 30mph gust can turn your carbon-fiber setup into a very expensive kite in a heartbeat. But there’s a secret weapon hiding in plain sight on almost every professional tripod—a small, often overlooked metal hook at the bottom of the center column.
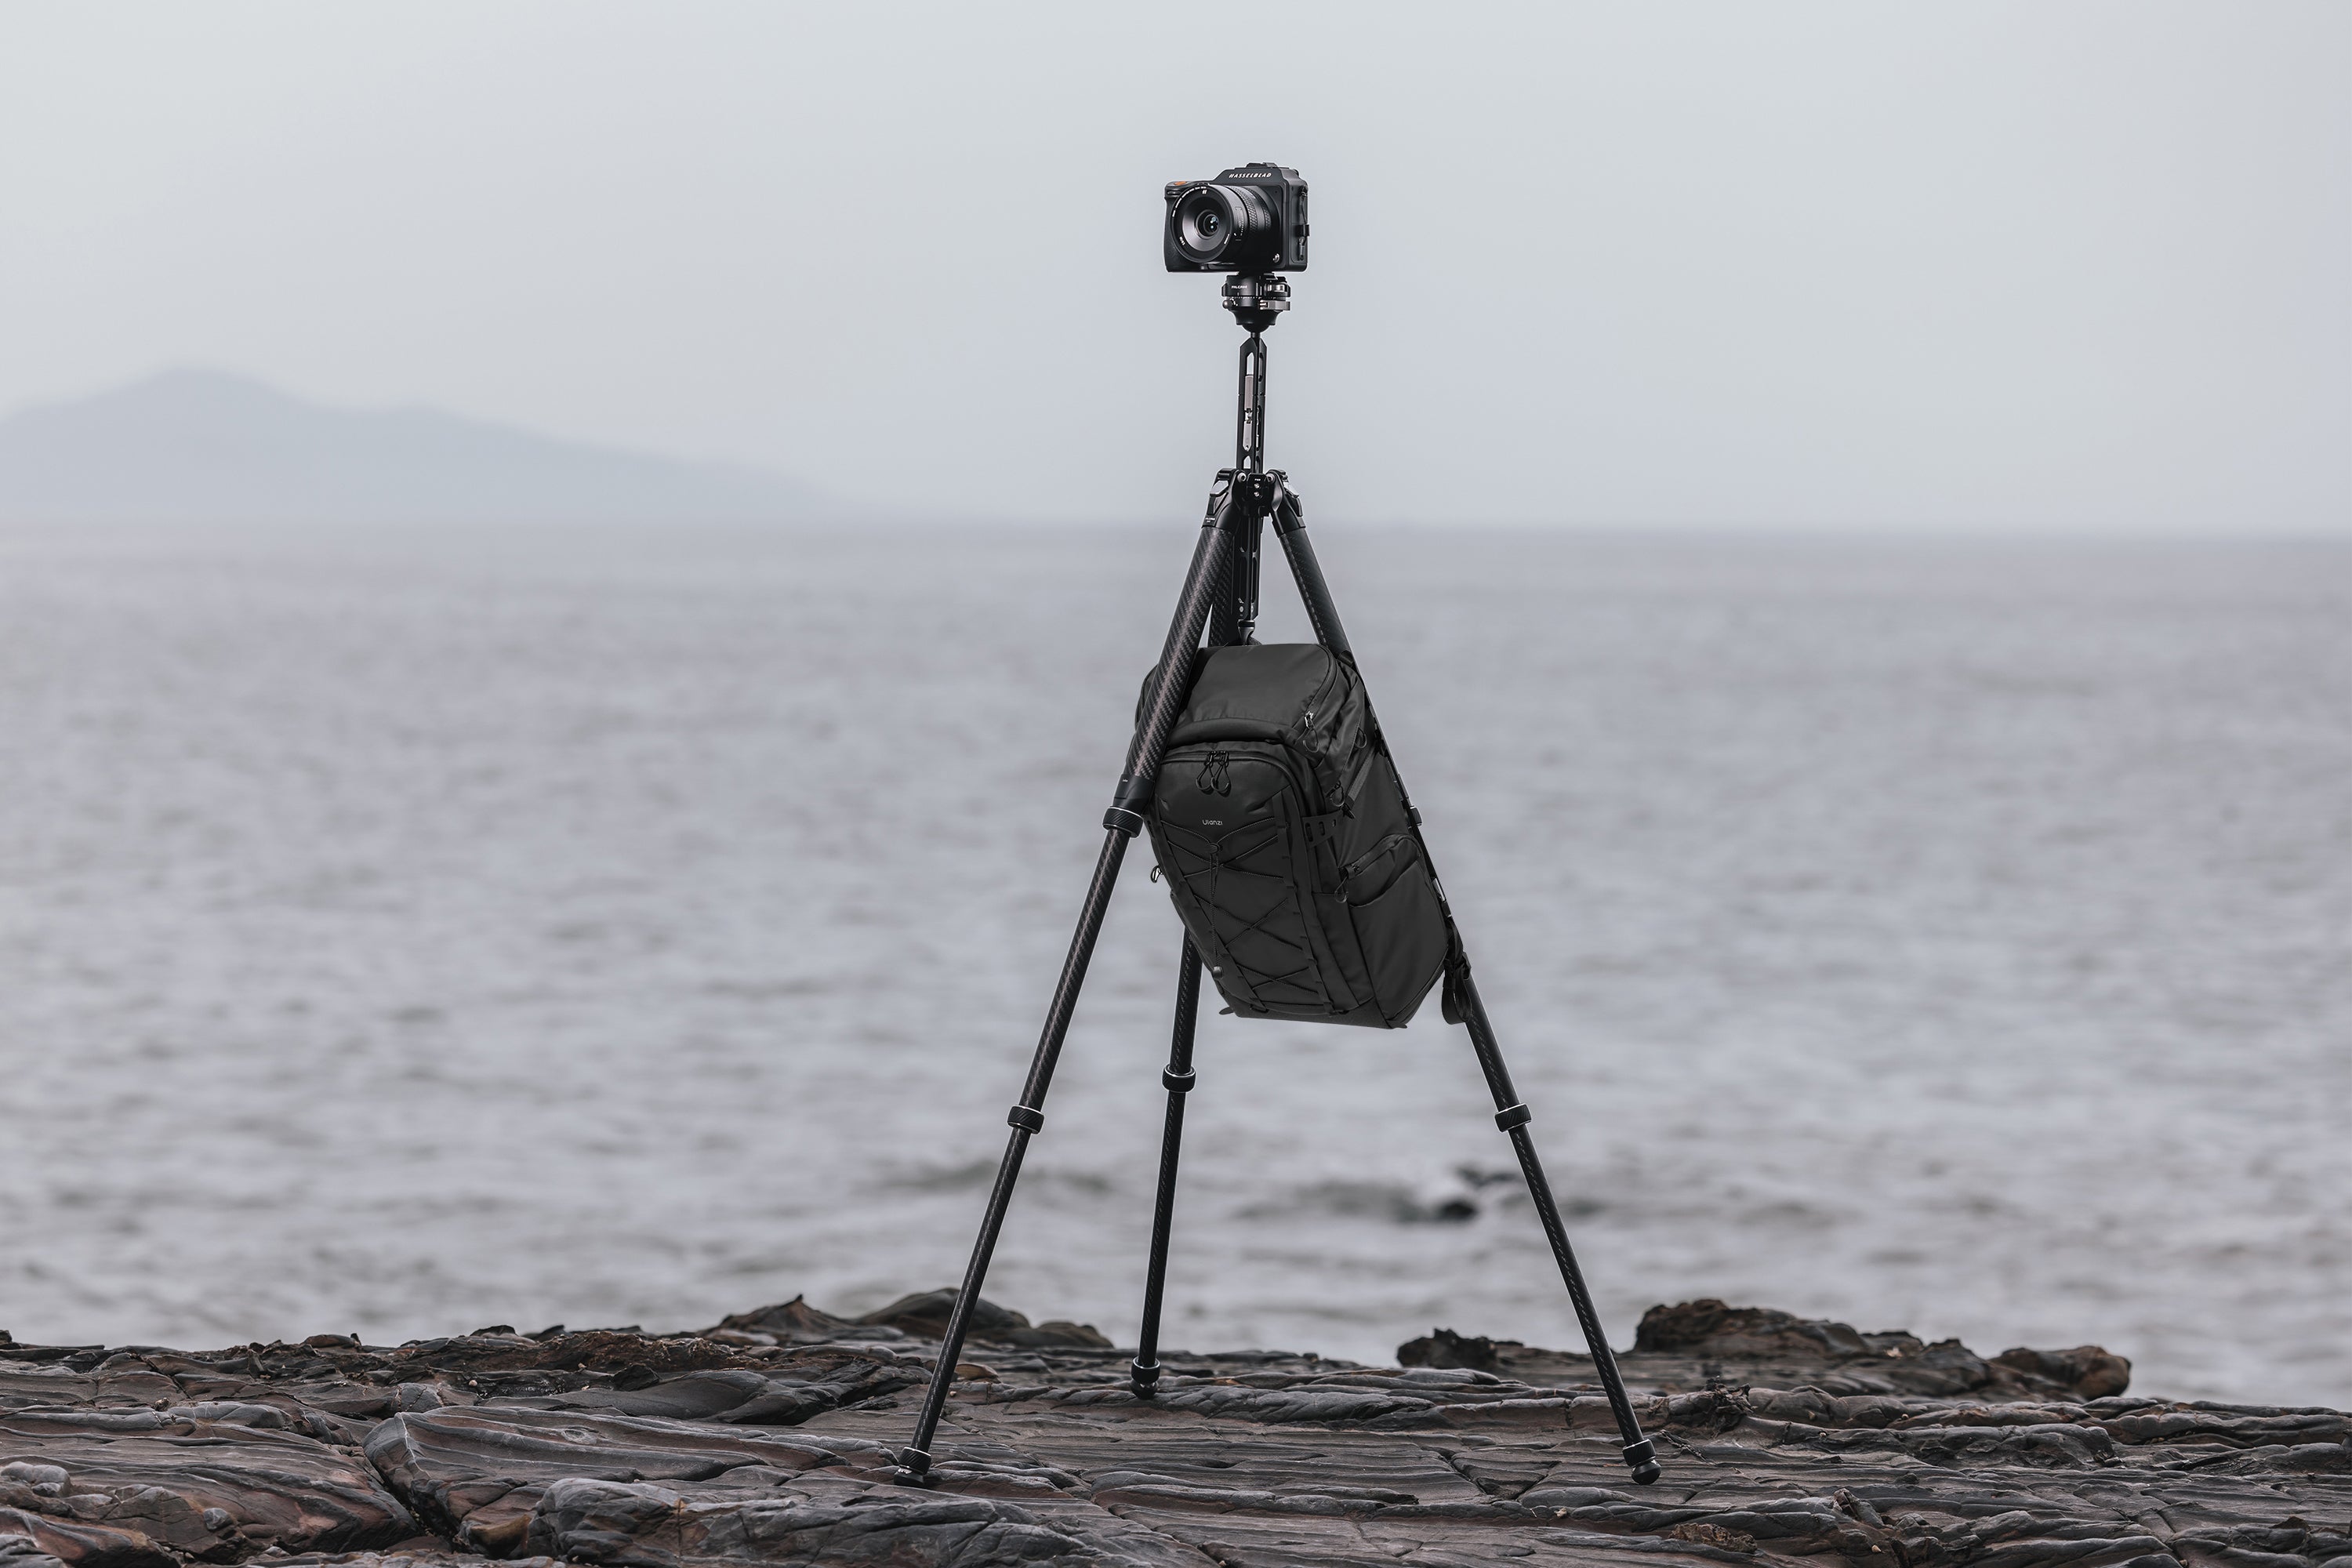
The primary use for the hook at the bottom of a tripod’s center column is counterweighting. By hanging a weighted object like a sandbag or your camera bag from it, you effectively lower the setup's center of gravity. This significantly increases stability, dampens vibrations, and prevents the tripod from tipping over in high winds. Research shows that utilizing just a 5lb counterweight can reduce micro-vibrations by up to 40% during long-exposure shots. Beyond stability, the hook serves as a crucial organizational anchor to keep your gear off wet ground and manages messy cables during video or tethered shoots.
1. Counterweighting for Rock-Solid Stability
Let’s get technical for a second. When you extend your tripod to eye level, you’re essentially creating a top-heavy structure. Add a heavy telephoto lens and a full-frame body, and you’ve moved the center of mass dangerously high. In a laboratory, that’s fine. In the real world, where wind exists, it’s a recipe for "shutter blur."
By hanging weight from that center hook, you are pulling the tripod’s mass downward toward the apex of the legs. I’ve found that even a modest weight makes a massive difference. According to field tests, a 5lb counterweight is the "sweet spot" for most travel tripods, offering a 40% reduction in those tiny, pixel-smearing micro-vibrations that ruin high-resolution landscape shots.
Marcus’s Field Tip: The most common mistake I see? Letting the weight touch the ground. To be effective, the weight must hang freely. If your bag is resting on the dirt, it’s not providing downward tension; it’s just sitting there. This is what I call the "Clearance Rule": always ensure there is at least two inches of daylight between your counterweight and the surface you're standing on.
However, you have to be careful. Every tripod has a maximum load capacity. When you calculate your weight, you have to add the camera, the lens, the tripod head, and the counterweight together. If you’re using a lightweight travel tripod rated for 15lbs and you’re already rocking 10lbs of camera gear, don't hang a 20lb rock from the hook. You’ll risk snapping the center column or stripping the locking threads.
Comparison: Best Counterweight Options
| Weight Type | Pros | Cons | Best For |
|---|---|---|---|
| Dedicated Sandbag | Extremely stable; doesn't swing much. | Heavy to carry to the location. | Studio or car-accessible spots. |
| Your Camera Bag | You already have it; easy to adjust. | Can act like a "sail" in high winds. | General outdoor adventures. |
| Water Bottle/Bladder | Dual-purpose; can empty it for the hike back. | Tends to swing like a pendulum. | Ultra-light backpacking. |
| Stones in a Mesh Bag | Zero carry weight; find them on-site. | Can be hard to find the right size/weight. | Remote expeditions. |
2. On-Location Gear Organization
As an adventure editor, I’m often shooting in environments that are... less than sterile. Whether it’s the muddy banks of a river in the Olympic Peninsula or the fine, invasive sands of the Saharan dunes, the last thing I want is to set my $400 camera bag down on the ground.
This is where the tripod hook becomes an organizational lifesaver. Over 75% of professional landscape photographers regularly use the hook as a "gear station." By hanging your bag, you keep your zippers away from the mud and your extra lenses at waist height.
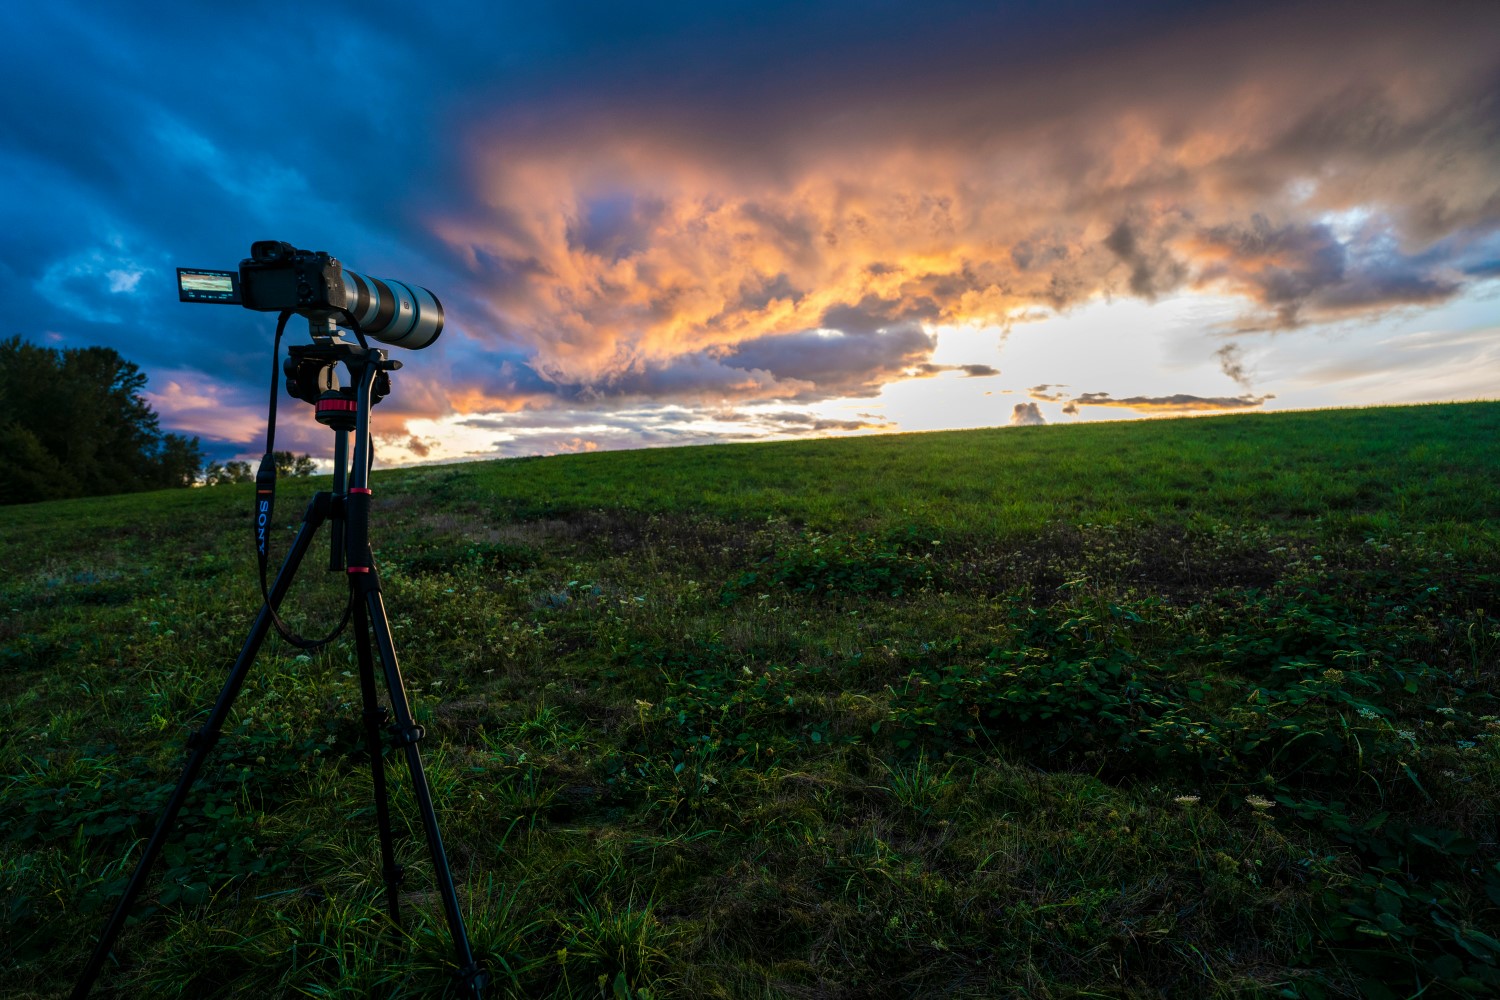
It’s about more than just cleanliness; it’s about efficiency and speed. When the light is changing rapidly during a "Golden Hour" transition, you don't want to be bending over, digging through a bag in the tall grass. Having your bag suspended directly beneath your camera means your filters, remote shutters, and spare batteries are within arm's reach. It keeps your shooting site "clean," which is vital when you’re working in cramped spaces or on the edge of a cliff where a misplaced step could send your bag tumbling into the abyss.
3. Cable Management for Video and Tethered Shoots
If you’re moving into the world of video or high-end commercial work, you’ll quickly realize that cables are the enemy. HDMI cables for external monitors, USB-C tethering cables, and power banks—they all create a "rat's nest" that is both a trip hazard and a danger to your camera’s ports.
I’ve seen $3,000 cameras pulled off tripods because someone caught their foot on a dangling tether cable. By using the tripod hook as a central anchor point, you create a "strain relief" system. You can loop your cables through the hook or use a small carabiner to clip them there. This ensures that if someone (or you) accidentally tugs on a wire, the tension is taken by the heavy-duty metal hook rather than the fragile micro-ports on the side of your camera body.
For solo shooters running external battery packs (like a V-mount or a large power bank), hanging the battery from the hook serves two purposes: it powers your rig and acts as your counterweight simultaneously. It’s a gear-hack that keeps your setup lean and mean.
Pro Hack: The 'Bungee to Ground' Method
Sometimes, hanging a bag from the hook backfires. If you’re in a true gale, a hanging bag becomes a pendulum. It starts to swing, and that swinging motion actually creates vibration rather than dampening it. This is where the pros use the Bungee to Ground method.
Instead of hanging a weight that dangles in the air, you attach a bungee cord or a piece of paracord to the hook and stretch it down to a heavy object sitting firmly on the ground (like a heavy rock or a sandbag). This creates constant downward tension without the risk of the "pendulum effect." It anchors the tripod to the earth itself. I’ve used this trick on the coast of Iceland during storms that were literally blowing people over, and my long exposures still came out tack-sharp.
Essential Checklist for Sharper Shots
Stability is a holistic process. The hook is the foundation, but to get that professional-level clarity, you need to combine it with a few internal camera settings. I never fire a long exposure without running through this mental checklist:
- Use a Two-Second Timer or Remote Release: Even the softest touch of the shutter button introduces movement. Use the built-in timer or a dedicated remote.
- Mirror Lock-up (for DSLR users): The physical "slap" of the mirror inside a DSLR can cause blur. Enable Mirror Lock-up to let the vibrations settle before the shutter opens.
- Electronic Shutter: If you’re shooting mirrorless, use the Electronic Front Curtain Shutter (EFCS) to eliminate mechanical shutter shock.
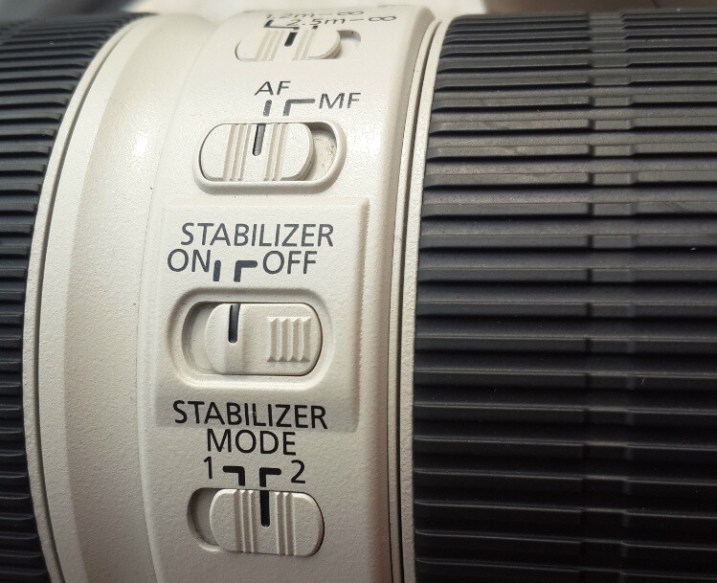
- Turn off Image Stabilization (IS/VR): This is the most counter-intuitive tip. Most stabilization systems are designed to counteract handshake. When the camera is on a rock-solid tripod, the system can actually get "confused" and create its own micro-jitters while searching for movement that isn't there.
FAQ
Q: Can I hang my bag if it’s raining? A: Absolutely, but be mindful of the "sail effect." If the bag gets soaked, it becomes heavier, which is good for stability, but make sure your bag's rain cover is on. I often use a dedicated "stone bag" (a small mesh sling that fits between the tripod legs) if the weather is truly nasty.
Q: Is there such a thing as "too much weight"? A: Yes. Most travel tripods have a weight limit between 10lb and 25lb. If you hang a 30lb bag on a 15lb-rated tripod, you’re asking for a mechanical failure. Always check your manufacturer’s specs before going heavy.
Q: My tripod doesn't have a hook. Can I add one? A: Many center columns have a 1/4"-20 or 3/8"-16 threaded hole at the bottom. You can buy a cheap stainless steel eye-bolt or a dedicated tripod hook from most camera stores and simply screw it in.
Take Your Next Shot to the Next Level
The difference between a "good" landscape photo and a "breathtaking" one often comes down to the smallest details—literally. That tiny hook is the difference between a blurry mess and a shot you can print six feet wide. Next time you’re out in the field and the wind starts to pick up, don't pack up and head for the car. Hang your bag, check your clearance, and keep shooting.
Stay adventurous, stay sharp.