Whether you are a professional photographer preparing a portfolio, a small business owner crafting bespoke marketing materials, or an individual designing high-end wedding invitations, the leap from standard 20 lb bond paper to heavy cardstock is a significant one. While the tactile quality of a 110 lb cover stock offers an undeniable sense of luxury and permanence, it also presents a formidable challenge to the average home or office printer.
The transition from standard paper to cardstock is often fraught with mechanical "nightmares"—the dreaded paper jam, the frustration of smeared ink, or the unsightly "roller marks" that can ruin an expensive stack of media. However, achieving professional-grade results is entirely possible with the right technical approach. To print on cardstock successfully, you must access your printer’s 'Preferences' or 'Properties' menu and specifically select 'Media Type' to 'Cardstock' or 'Heavy Paper.' This adjustment is critical; it tells the printer to recalibrate its roller tension and ink distribution to accommodate the increased thickness. Furthermore, using a rear-feed tray or manual bypass slot—which provides a straighter path for thick materials—reduces the risk of paper curling and mechanical misfeeds by approximately 40% compared to traditional bottom-loading paper cassettes.
Step 1: Verify Printer Compatibility and Paper Weight
Before you load a single sheet of premium cardstock, you must consult your printer’s technical specifications. Not all printers are built to handle the physical resistance of heavy fibers. Standard home office models typically support cardstock up to 65 lb (approximately 176 gsm). Attempting to force a 110 lb (300 gsm) sheet through these machines often leads to internal mechanical damage, specifically to the feed rollers and the drive motor.
Professional-grade models, particularly those featuring a dedicated rear-feed path, are engineered for high-density media and can comfortably handle up to 110 lb or even 140 lb stock. To ensure your hardware is up to the task, check the "Paper Handling" or "Media Specifications" section of your manual. Look specifically for the "Maximum Media Weight."
To assist in your planning, refer to the conversion table below to ensure your selected paper aligns with your printer’s capabilities:
| Paper Type | Weight (U.S. lb) | Weight (Metric gsm) | Recommended Use |
|---|---|---|---|
| Standard Paper | 20–24 lb | 75–90 gsm | Documents, drafts |
| Mid-Weight Cardstock | 65 lb | 176 gsm | Flyers, brochures, posters |
| Heavy Cardstock | 80 lb | 216 gsm | Business cards, light invitations |
| Extra-Heavy Cardstock | 100–110 lb | 270–300 gsm | Professional invitations, menus |
Pro Tip: The Mechanical Limit Exceeding your printer’s rated GSM isn't just a risk for jams; it can cause the print head to strike the surface of the paper (a "head strike"), leading to permanent hardware damage or permanent ink streaks on the page.
Step 2: Choose the Right Cardstock Type
Understanding the chemistry and physics of your paper is just as important as the hardware itself. Cardstock is generally categorized as either coated or uncoated. Coated paper (glossy or silk) has a surface layer that prevents ink from soaking into the fibers, which is excellent for sharp, vibrant photography but can lead to smearing on inkjet printers if the ink doesn't dry fast enough. Uncoated cardstock is more porous, allowing for deep ink absorption, which is ideal for a classic, matte aesthetic.
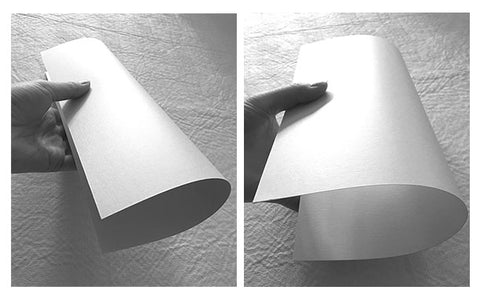
Another critical factor is "Paper Grain." All paper has a grain direction—the way the fibers are aligned during manufacturing. If you try to feed heavy cardstock "against the grain," the printer’s rollers will struggle to bend the paper, significantly increasing the likelihood of a jam. You can perform a "Bend Test" by gently curving the paper in both directions; the direction with the least resistance is the grain direction.
For the best results, match your project weight to the intended use. A 65 lb stock is sufficient for high-quality flyers that need to be folded, whereas 80-110 lb stock is the industry standard for invitations and business cards that require structural rigidity.
Step 3: Configure Printer Software Settings
Once you have verified the hardware and selected your media, the next step occurs within the printer driver software. Simply hitting "Print" on default settings is a recipe for failure. The printer needs to know the exact density of the media to adjust the "Platen Gap"—the physical distance between the print head and the paper.
- Open your document and select Print.
- Navigate to Printer Properties, Preferences, or System Dialog.
- Look for a tab labeled Media or Paper/Quality.
- Change the 'Type' or 'Media' setting from 'Plain Paper' to 'Cardstock', 'Heavy Paper', or 'Thick Paper'.
- If you are using a non-standard size (like a 5x7 invitation), ensure you set the Custom Paper Size to match your sheet exactly.
By selecting the "Thick Paper" setting, the printer often slows down the print speed. This allows for more precise ink placement and gives the ink more time to set before the page is ejected, preventing the common issue of ink "bleeding" or smearing.
Step 4: Physical Loading and Printing Techniques
The physical loading of cardstock is where most users falter. Standard bottom-loading trays require the paper to perform a 180-degree U-turn inside the machine. While 20 lb paper can make this turn easily, 110 lb cardstock is too rigid, leading to the paper getting stuck halfway through the turn.
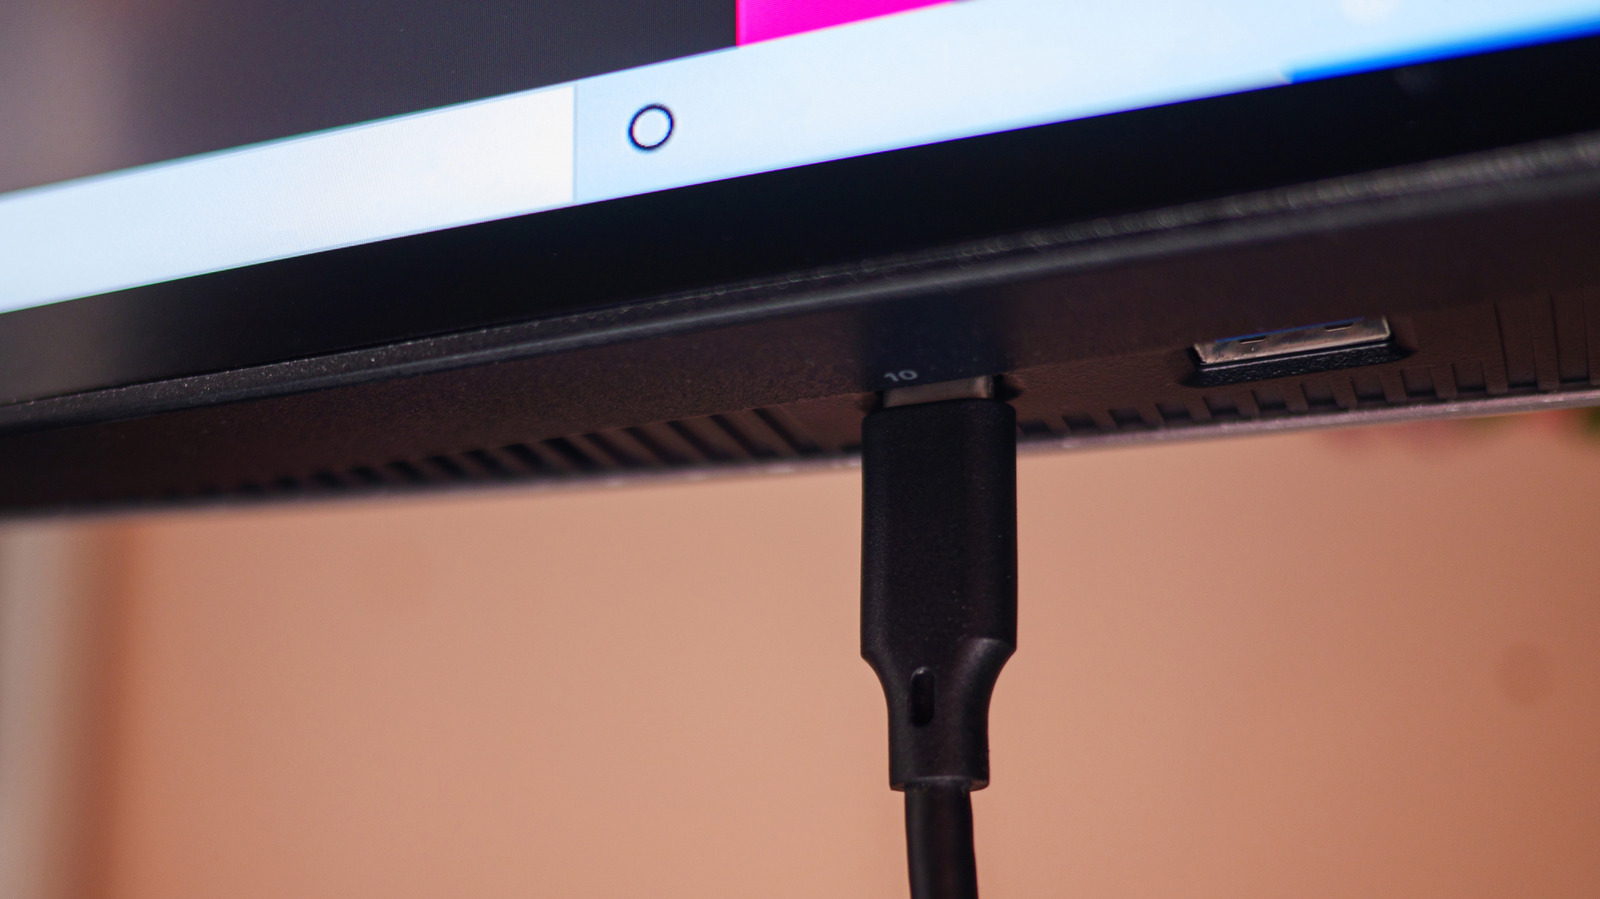
The "Gold Standard" for thick media is the rear-feed tray or manual bypass slot. These inputs provide a straight-through paper path, meaning the paper hardly bends at all as it passes through the internal rollers.
- The Single-Sheet Rule: To prevent misfeeds, load only one sheet of cardstock at a time. This prevents the rollers from accidentally grabbing multiple heavy sheets, which is a primary cause of mechanical failure in home printers.
- Align the Guides: Ensure the side guides are snug against the paper but not so tight that they cause the cardstock to buckle. Even a slight misalignment can result in a skewed print.
Step 5: Post-Printing Best Practices
Your work isn't finished once the paper exits the printer. Cardstock requires more care than standard bond paper during the finishing stages. Because the ink or toner sits thicker on the page, the "dry time" is significantly longer.
- Handling: Allow at least 5 to 10 minutes for inkjet prints to fully dry before stacking them. If you are using pigment-based inks (common in professional photo printers), wait at least 24 hours before framing or sealing the prints.
- Scoring and Folding: Never attempt to fold heavy cardstock by hand without "scoring" it first. Scoring involves creating a deliberate indentation along the fold line using a bone folder or a blunt edge. This breaks the tension of the surface fibers.
Failing to score the paper—or folding against the grain—will result in "cracking," where the outer fibers of the cardstock pull apart, revealing the white core of the paper and ruining the professional finish of your design.
Troubleshooting Common Cardstock Issues
Even with careful preparation, cardstock can be temperamental. If you encounter a paper jam, do not pull the paper out forcibly from the front. Instead, open the rear access panel to gently slide the paper out in the direction of the paper path. This protects the delicate sensors and rollers from damage.
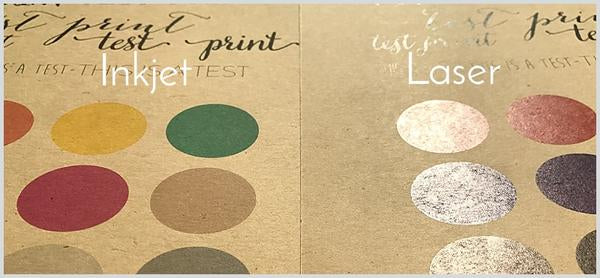
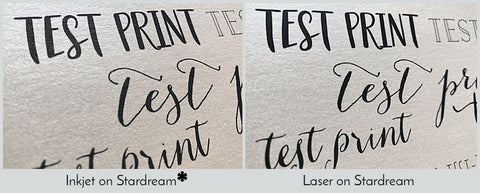
If you experience smudging, the issue is likely a mismatch between the ink type and the paper coating. Laser printers use heat to fuse toner to the surface, making them excellent for non-porous specialty papers like pearlescent or metallic cardstock. Inkjet printers, conversely, require a porous surface to "grab" the liquid ink.
Pro Tip: Loosen the Grain If your printer is having trouble grabbing the paper, try "fanning" the stack or gently bending the leading edge of the cardstock to help it conform to the initial intake roller.
FAQ
Q: Can I use a standard office laser printer for 110 lb cardstock? A: Most standard office lasers are capped at 65 lb or 80 lb. Printing 110 lb stock on these machines often results in the toner not fusing correctly, meaning the text will literally rub off the page. Check if your model has a "thick paper" mode in the settings.
Q: Why is my cardstock coming out curled? A: Curling is usually caused by the heat of the fuser (in laser printers) or the paper being forced through a U-shaped path. Using a rear-feed tray and allowing the paper to cool on a flat surface immediately after printing will solve this.
Q: My printer says 'Paper Mismatch.' What do I do? A: This happens when the software setting (e.g., "A4 Cardstock") doesn't match the physical paper size detected in the tray. Ensure your "Custom Paper Size" in the print dialog matches the physical dimensions of your stock.
Ready to Elevate Your Printing?
Printing on cardstock is a masterclass in detail and patience. By respecting the mechanical limits of your hardware and correctly configuring your software, you can produce professional-quality materials that rival commercial print shops. For those looking to upgrade their home office to handle these heavy-duty tasks, we recommend exploring models with dedicated manual bypass slots.