Quick Facts
- Best Resolution: Use 12MP for snapshots, 24MP for daily high quality, and 50MP or 200MP for detailed landscapes.
- Optimization Levels: Set to Maximum for static shots and Minimum to eliminate shutter lag when shooting moving subjects.
- Essential Feature: Use Settings to Keep to prevent the camera from resetting your resolution and mode choices every time you close the app.
- Pro Control: Leverage RAW format and manual shutter speed to capture difficult scenes like the northern lights or high-contrast sunsets.
- Must-Have App: Download Samsung Camera Assistant from the Galaxy Store for granular control over shutter speed and lens switching.
- Direct Answer: To maximize samsung camera settings for best pictures, switch from the default 12MP to high-resolution modes and enable 'Settings to keep' to prevent the app from resetting your choices.
To get the best results from your device, you need to go beyond the defaults. We explain the core samsung camera settings you must change for professional-grade photography. As someone who spends hundreds of hours testing every new Galaxy flagship, from the foldable series to the Ultra line, I have seen how the right software tweaks can transform a "good" photo into a masterpiece. Samsung hardware is arguably the best in the world, but the out-of-the-box configuration is often designed for file-size efficiency rather than pure visual fidelity. If you want your photos to reflect the true power of your phone, these four changes are non-negotiable.
1. Maximize Resolution and Enable Settings to Keep
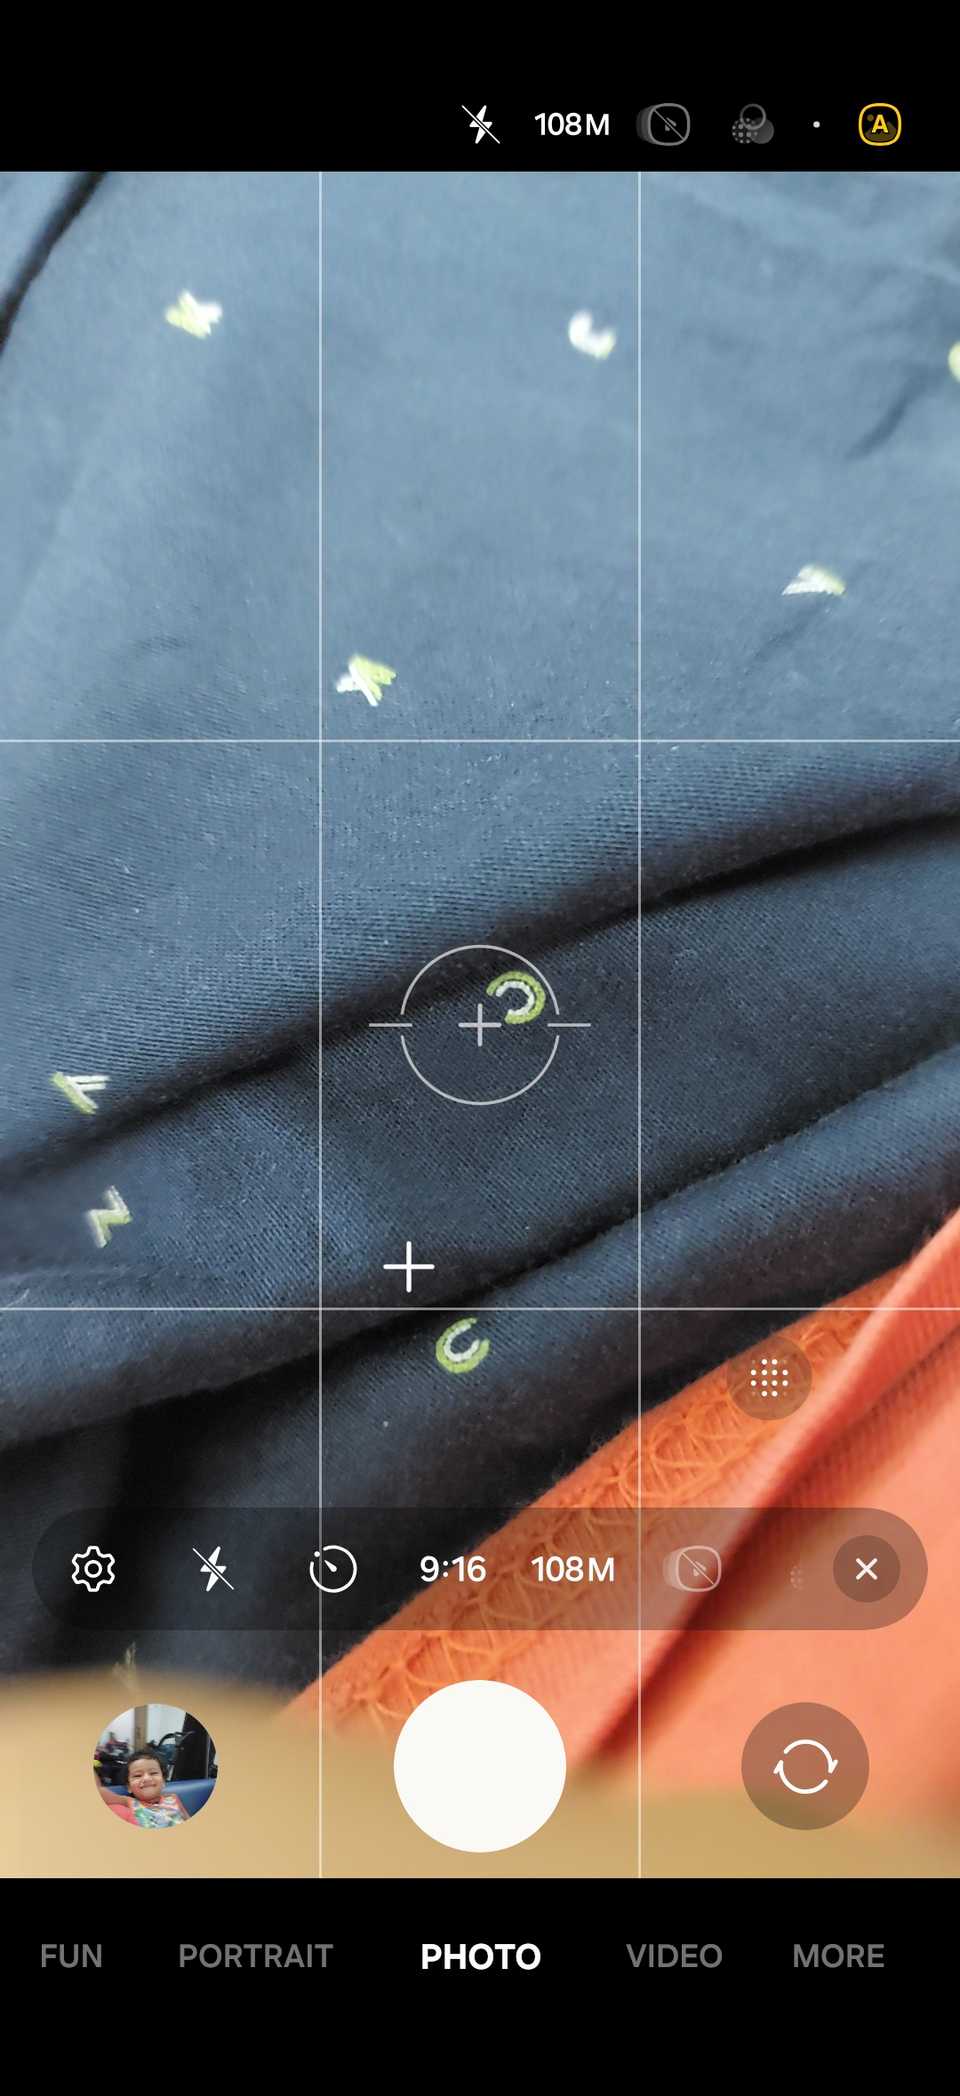
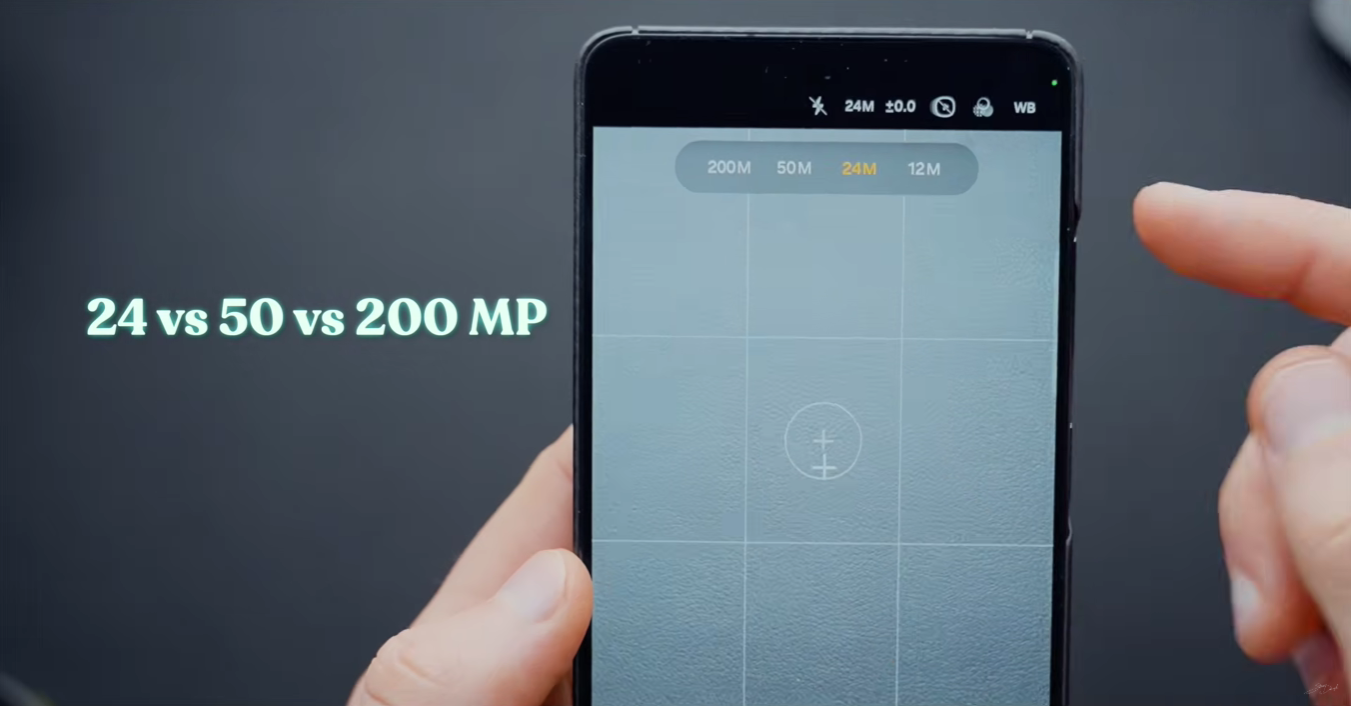
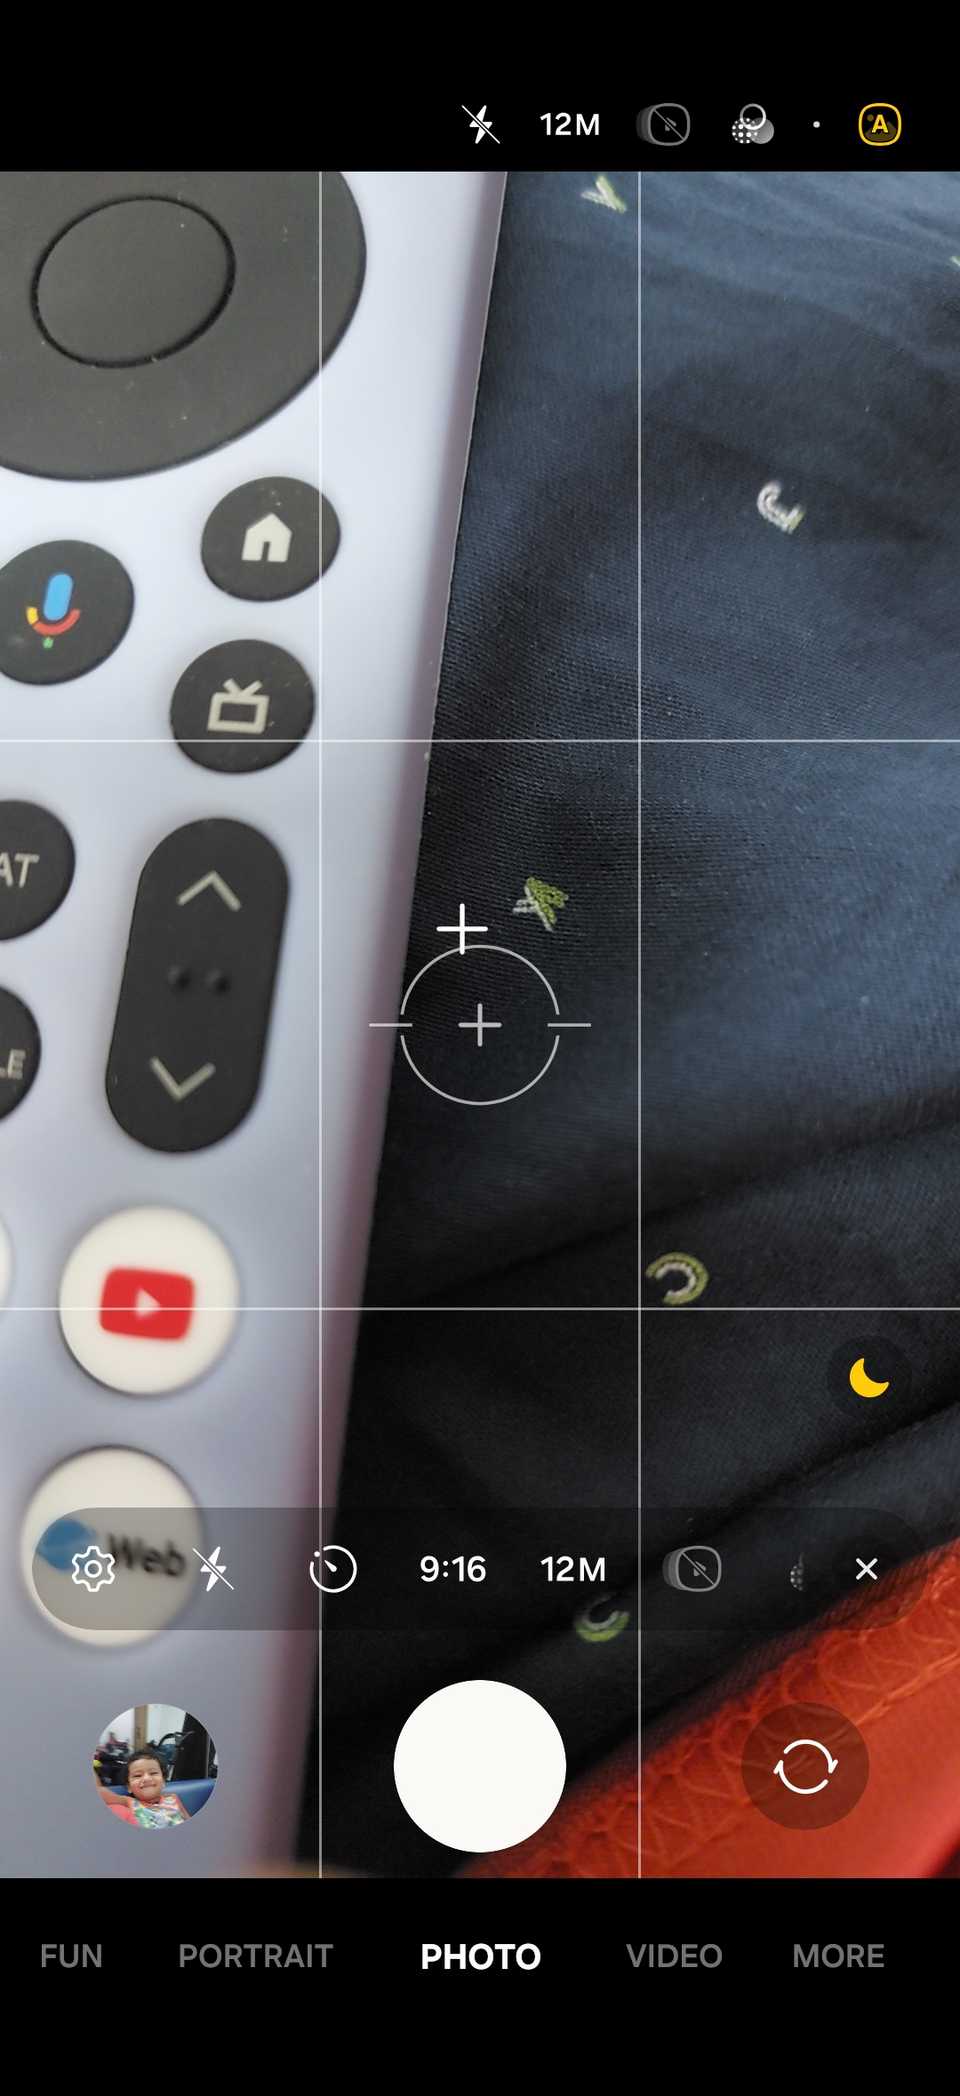
By default, even a device with a massive sensor will take 12MP photos. This is due to a process called pixel binning, where multiple pixels are grouped together to improve light sensitivity. While great for low light, it leaves a lot of detail on the table during the day. To fix this, open your camera app and look for the megapixel icon at the top of the viewfinder. Depending on your model, you can choose 50M or 200M to unlock the full potential of your sensor. The Samsung Galaxy S24 Ultra utilizes a 200-megapixel primary image sensor, which is currently the highest resolution available in the lineup, offering incredible cropping potential.
Finding the 24MP Sweet Spot
If you are using a newer model like the S24 or looking ahead to the samsung s26 ultra camera settings guide, you might notice a 24MP option. This is the "Goldilocks" setting. It uses computational photography to blend the light sensitivity of a 12MP shot with the sharpness of a high-res shot. It provides a significant boost in dynamic range without creating the massive file sizes associated with samsung 200 megapixel camera settings.
Don't Let Your Settings Reset
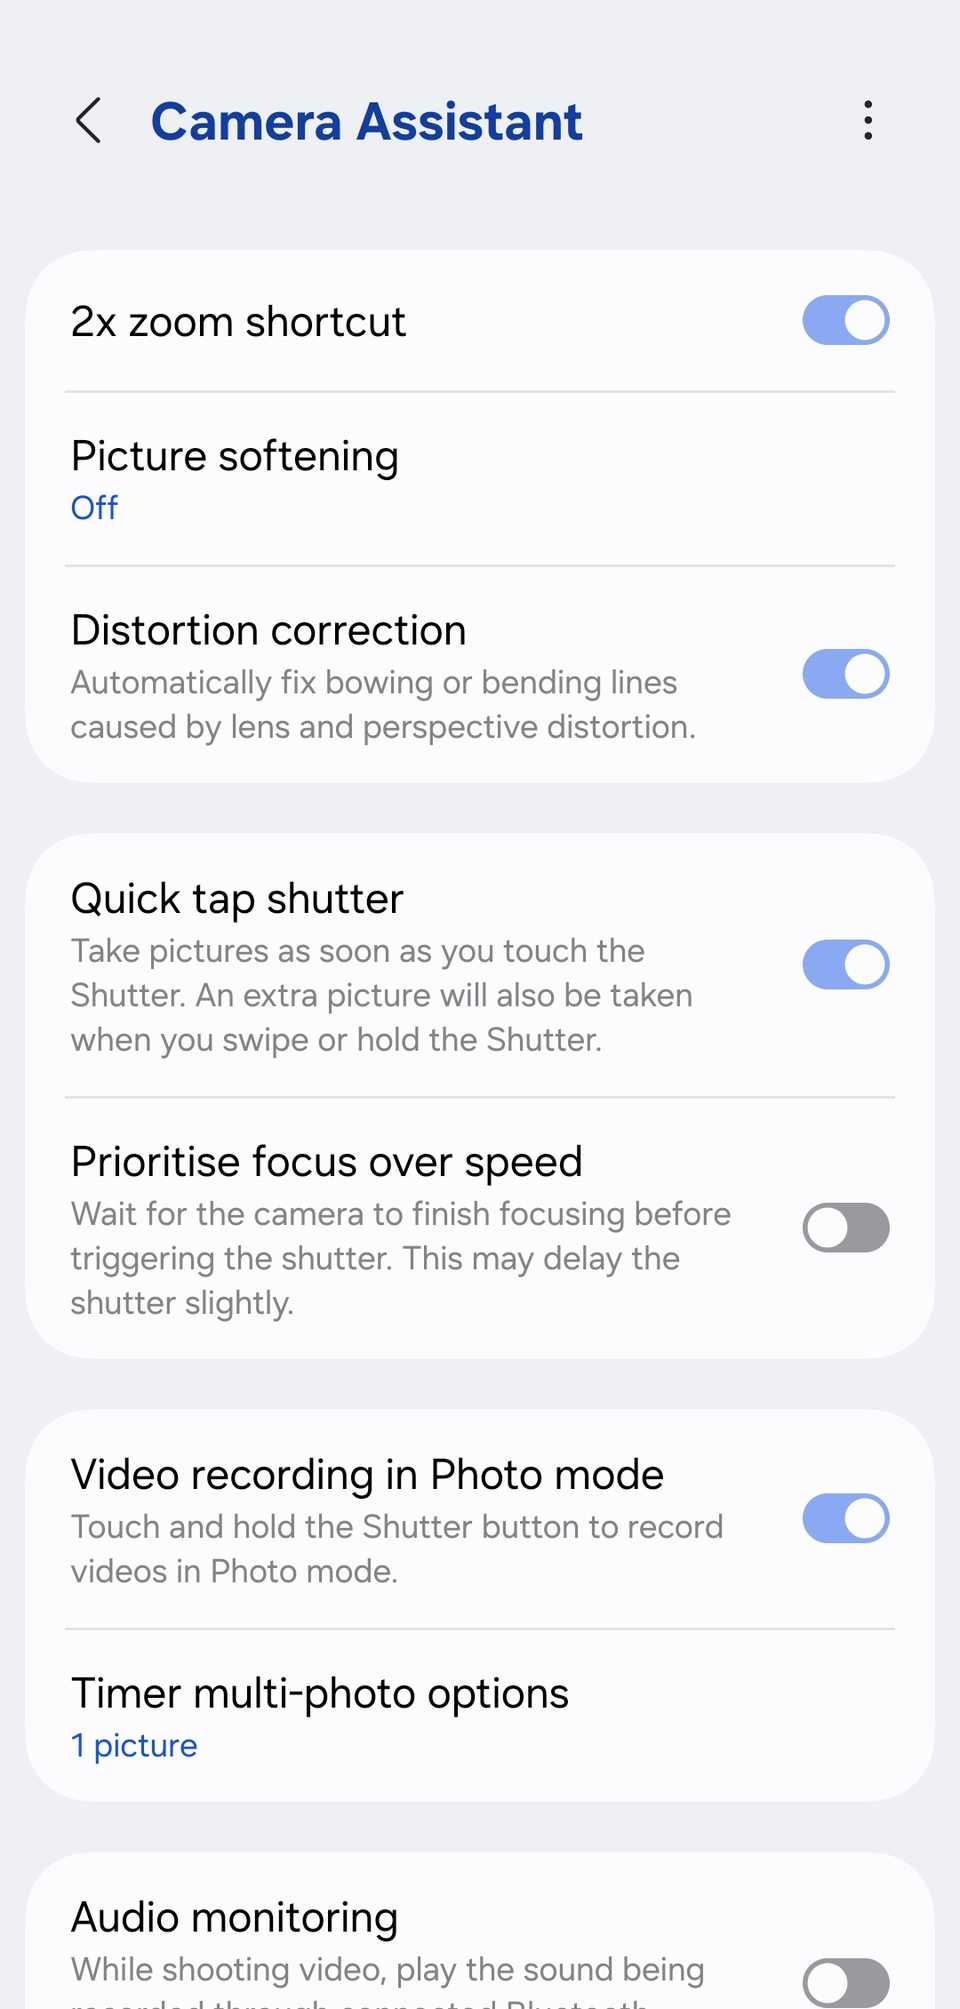
There is nothing more frustrating than carefully selecting your samsung s23 camera settings for best quality only to find the app has reverted to 12MP the next time you open it. This is where the Settings to Keep menu becomes your best friend. Navigate to Camera Settings > Settings to keep, and toggle on High Resolution. This ensures your phone remembers that you prefer 50MP or 200MP. This section of the samsung phone camera settings explained is the most common fix for users who feel their photos look "soft" or lack detail consistently.
2. Master Intelligent Optimization Levels
Samsung's AI processing is aggressive. Sometimes it makes a photo look stunning; other times, it makes skin look like plastic or grass look neon green. In the camera settings, you will find a menu called Intelligent Optimization. This feature allows you to choose how much post-processing the phone applies immediately after you hit the shutter button. This is where you control the balance between quality and speed.
| Optimization Level | Best For | Impact on Shutter Lag |
|---|---|---|
| Maximum | Landscapes, Architecture, Food | High (Slower capture) |
| Medium | General daily use, Street photography | Moderate |
| Minimum | Moving pets, Children, Sports | Low (Near-instant capture) |
Using Scene Optimizer
Inside the Intelligent Optimization menu, you will also find the Scene Optimizer toggle. Samsung's Scene Optimizer feature is designed to intelligently recognize and enhance over 30 different scene categories, including pets, landscapes, and text. While this is great for beginners, professional photographers often turn it off to maintain more natural colors and avoid the "over-processed" look.
Solving the Shutter Lag Issue
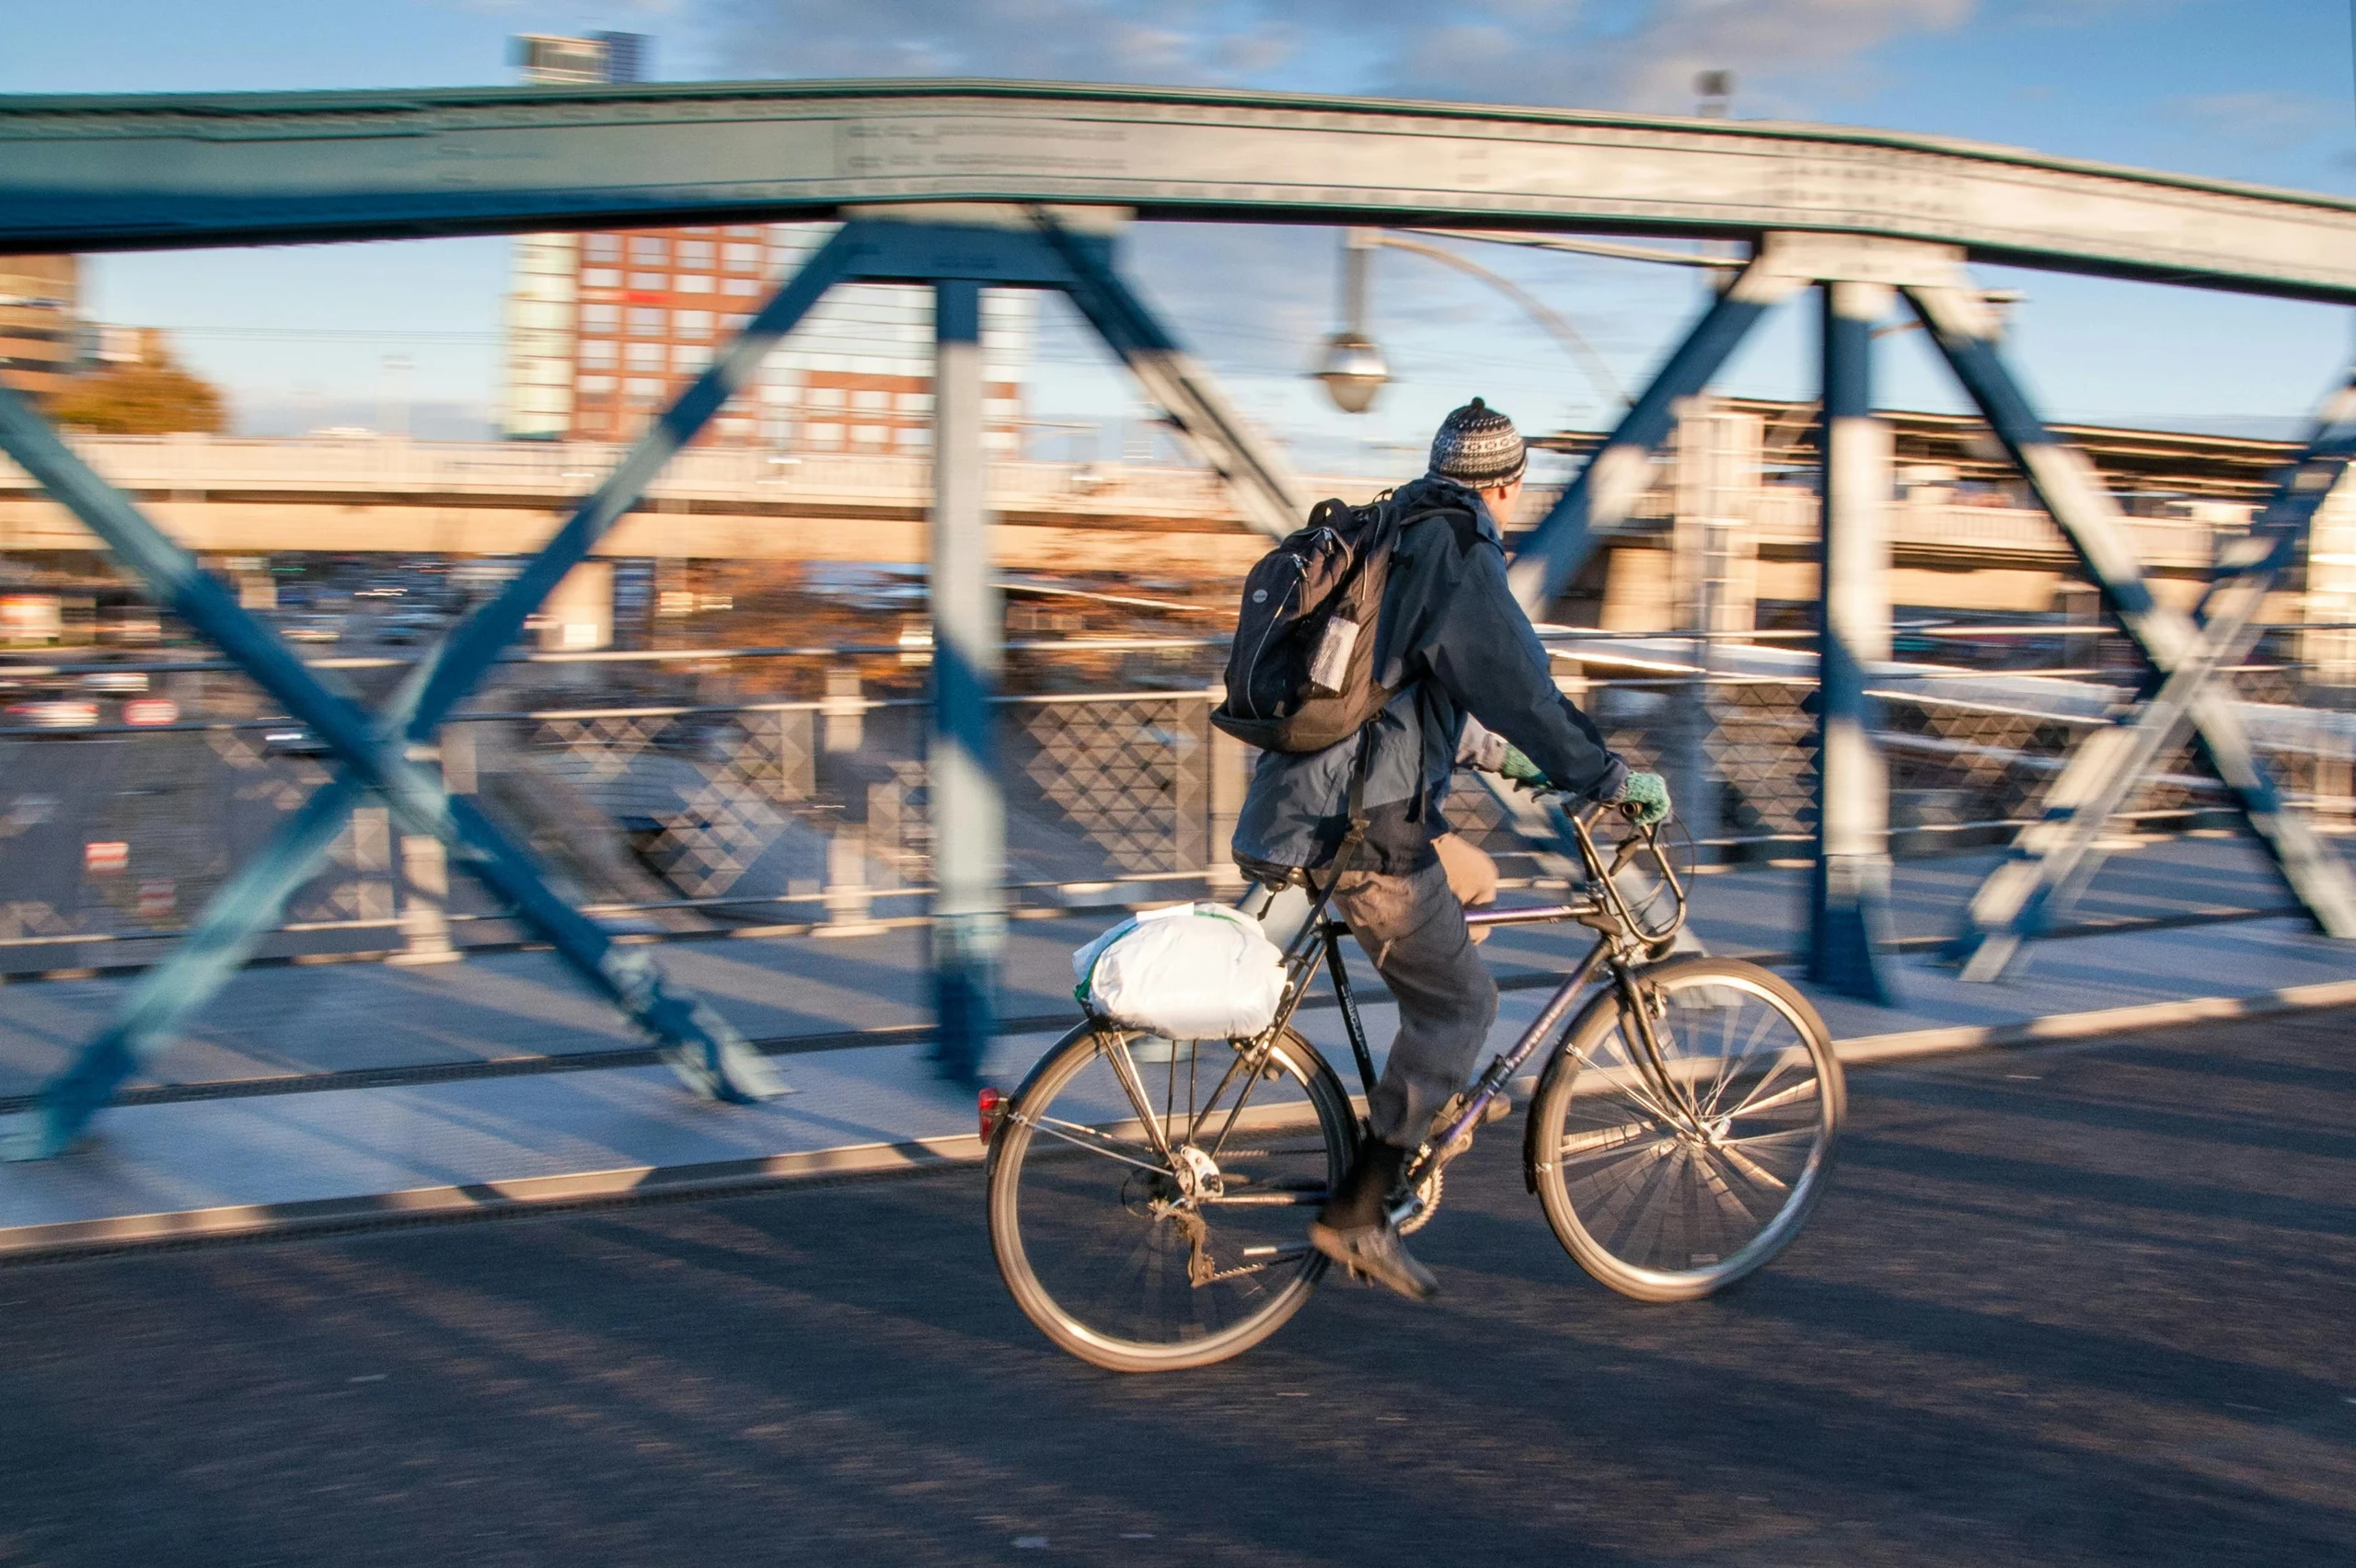
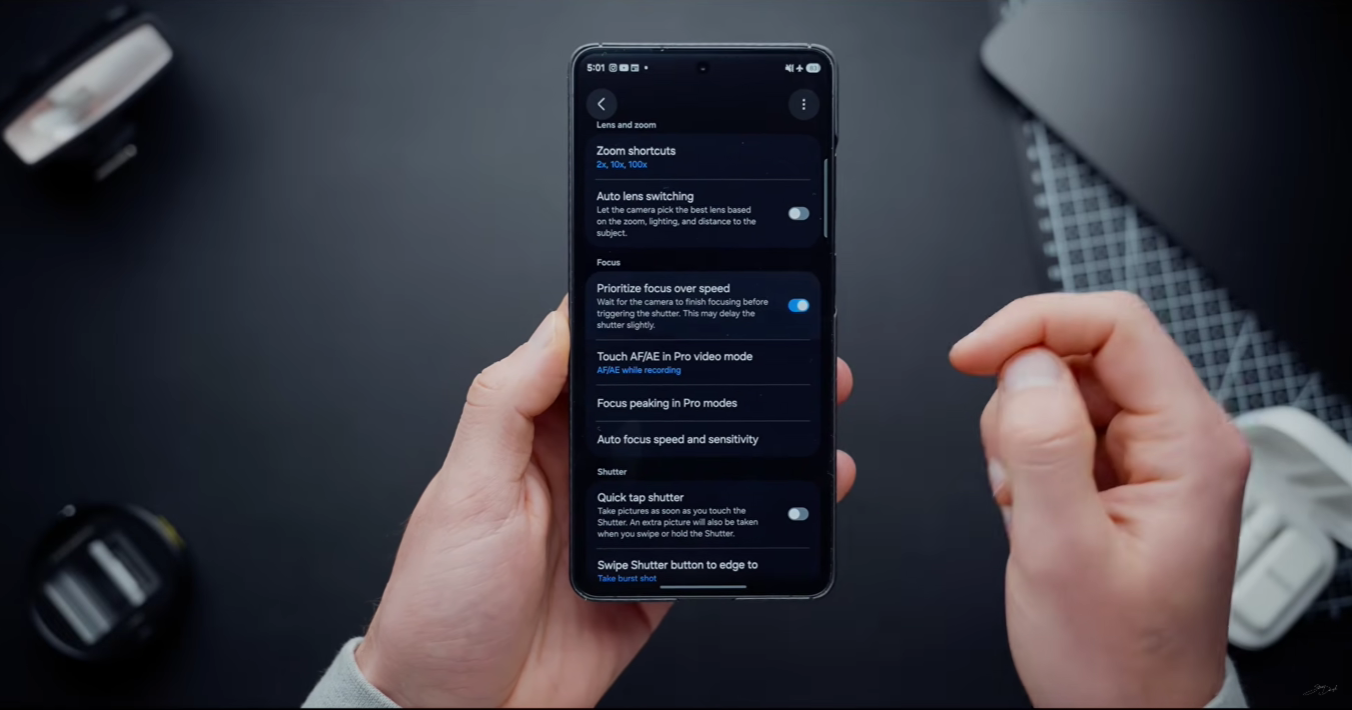
One of the biggest complaints about samsung camera settings is shutter lag—the delay between pressing the button and the photo being taken. If you are trying to capture a moving target, set your optimization to Minimum. This reduces the computational photography load, allowing the phone to prioritize a faster Shutter speed. For even faster results, I highly recommend downloading the Camera Assistant app from the Galaxy Store and enabling the "Quick tap shutter" option.
3. Manual Exposure and Focus Control
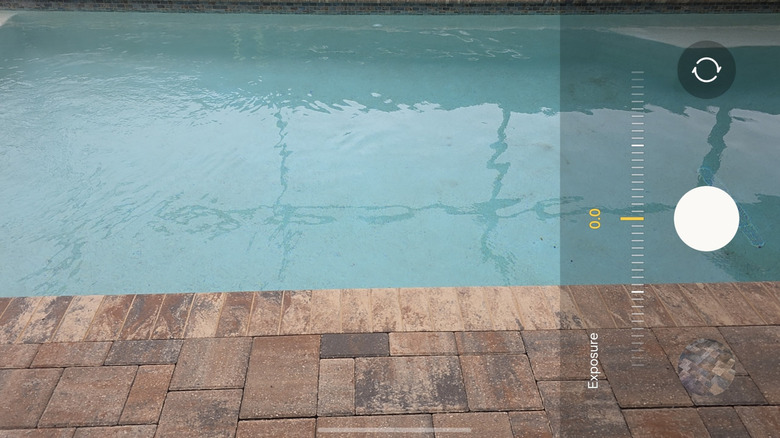
You don't always need to go into full manual mode to get better results. Simple manual overrides in the standard Photo mode can solve 90% of lighting issues. When you tap on your subject in the viewfinder, a yellow circle appears along with a slider featuring a sun icon. This is your exposure adjustment.
In bright outdoor scenes, the sky often gets "blown out" or turns completely white. To fix this, tap the screen and move the slider toward the minus sign. This preserves the visual fidelity of the clouds and prevents highlight clipping. Conversely, if you are shooting in a dark room, sliding toward the plus sign can help reveal details in the shadows before the AI even kicks in.
Precision Focusing
If you struggle with a blurry camera on Samsung when taking close-up shots or shooting through glass, manual focus is the answer. While standard mode handles most things, you can long-press the viewfinder to "AF/AE Lock." This prevents the camera from hunting for focus if something moves in the background. For those using the samsung phone camera settings for northern lights, locking focus to infinity in the Pro Mode menu is essential to ensure the stars remain sharp rather than appearing as blurry blobs.
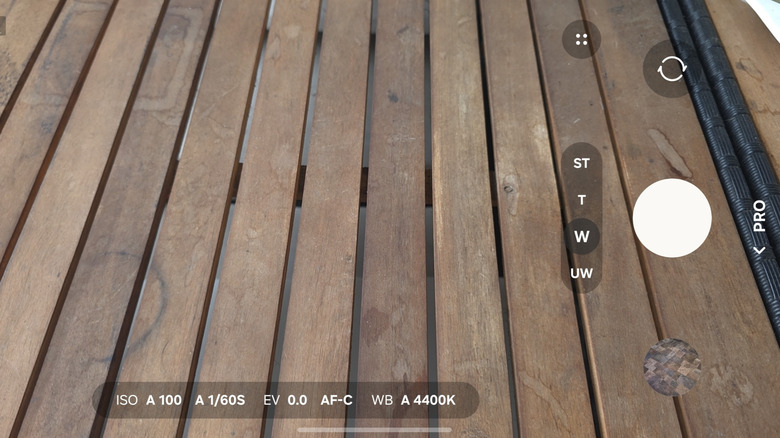
4. Unlocking Pro Mode and RAW Format
For the ultimate control, you must leave the standard Photo tab and enter Pro Mode. This is where your phone stops acting like a "point-and-shoot" and starts acting like a DSLR. Here, you have direct control over ISO sensitivity and Shutter speed.
- ISO sensitivity: Controls how sensitive the sensor is to light. Keep this as low as possible (ISO 50 or 100) to avoid digital noise or grain.
- Shutter speed: Controls how long the sensor is exposed to light. A fast speed (1/1000) freezes motion, while a slow speed (2 to 30 seconds) is used for Nightography or light trails.
- Histogram: Use this small graph to ensure your light distribution is even and you aren't losing data in the extreme blacks or whites.
- Focus peaking: When focusing manually, this feature outlines the sharpest parts of your image in green, ensuring your subject is perfectly crisp.
The Power of RAW Format
If you plan on editing your photos in apps like Lightroom or Snapseed, you should enable RAW format in the camera settings. Unlike a standard JPEG, which compresses and throws away data to save space, a RAW file keeps everything the sensor captured. For the most serious creators, Samsung's Expert RAW application allows users to capture 16-bit Linear DNG files, providing uncompressed image data and a wider dynamic range for professional color grading.
By switching to these samsung camera pro mode best settings, you are taking the "intelligence" out of the phone's hands and putting the creative vision back into yours. Whether you are chasing the aurora or just trying to get a clear shot of your toddler, these manual controls are the key to professional-level results.
FAQ
How to improve camera quality in Samsung?
To improve quality, ensure you are shooting in the highest resolution available (50MP or 200MP) and keep your lens clean. Additionally, navigate to the Intelligent Optimization settings and set them to Maximum for static shots to allow the phone to use its full computational power for better color and detail.
What are Samsung camera's hidden features?
Many of the best features are hidden in the Camera Assistant app, which must be downloaded separately. These include the ability to disable Auto Lens Switching, which prevents the phone from jumping between lenses in tricky lighting, and the "Quick tap shutter" which captures the image the moment your finger touches the screen rather than when you lift it.
What is 12MP and 50MP on a Samsung camera?
These numbers refer to the resolution of the image. 12MP is the default and uses pixel binning to create smaller files that perform well in low light. 50MP uses more of the sensor's physical pixels to capture significantly more detail, which is ideal for large prints or images you plan to crop into later.
How to fix a blurry camera on Samsung?
Blurry photos are often caused by shutter lag or the camera focusing on the wrong subject. To fix this, switch Intelligent Optimization to Minimum to speed up the shutter, and tap the screen to manually set the focus point. If the blur persists, ensure "Tracking auto-focus" is enabled in the settings to keep moving subjects sharp.
Mastering your samsung camera settings is a journey of experimentation. I encourage you to take your phone out during the "golden hour"—the hour just before sunset—and toggle between these modes. You will quickly see that the hardware is capable of much more than the default settings suggest. Happy shooting!