Quick Facts
- Core Ratio: The distance between microphones must be at least three times the distance from each mic to its intended sound source.
- Reduction in Bleed: Adhering to this technique results in a signal level difference of approximately 9 to 12 decibels between microphones.
- Primary Goal: The rule is designed to eliminate the thin, hollow artifacts known as comb filtering.
- Vocal Baseline: A standard starting point for vocal microphone placement is roughly four finger-widths from the capsule.
- Mathematical Foundation: Following the Inverse Square Law, doubling distance reduces sound pressure by 6 decibels; the 3:1 ratio is a calculated threshold for clarity.
- Pro Verification: Always use a Listen in Mono test to verify phase alignment before finishing a recording session.
The 3-to-1 rule is a fundamental technique in audio engineering used to minimize phase cancellation when multiple microphones record different sources. It states that the distance between any two microphones should be at least three times the distance from each microphone to its intended sound source. Following this ratio ensures that any signal bleed between microphones is low enough in volume and delayed enough in time to prevent destructive wave interference.
Understanding the 3-to-1 Rule
In the world of professional audio engineering, we often talk about the search for the perfect sound. We obsess over the frequency response of a ribbon mic or the pre-amp gain on a high-end interface. But quite often, the biggest obstacle to a professional-sounding recording isn't the gear—it is the physics of the room. When you introduce a second or third microphone into a space, you are no longer just capturing sound; you are managing time.
The 3-to-1 rule is perhaps the most essential piece of microphone placement knowledge any creator can possess. At its core, the ratio provides a physical solution to an invisible problem: phase coherence. If you place Microphone A exactly one foot away from a guitarist, and Microphone B exactly one foot away from a second guitarist, the sound of the first guitar will eventually reach Microphone B. However, because it has to travel further to get there, it arrives slightly later. When these two signals are mixed together, the time delay causes specific frequencies to cancel each other out.
To visualize this, imagine Mic A is one foot from Speaker A. To follow the rule, Mic B must be placed at least three feet away from Mic A. This geographical separation ensures that the bleed—the sound of Speaker A entering Mic B—is quiet enough and delayed enough that it doesn't destroy the integrity of the primary signal.
It is important to distinguish this from the equidistant rule used in stereo recording. When you are using two microphones to capture a single source—like a grand piano or an acoustic guitar for a wide stereo image—you often want the mics to be the same distance from the source to keep the center image stable. The 3-to-1 rule, however, is specifically for sound source isolation when you have multiple distinct sources in the same room. Whether you are looking for 3 to 1 rule microphone placement examples in a drum booth or a live podcast room, the math remains your best friend.
| Mic to Source Distance | Minimum Mic-to-Mic Distance | Resulting Isolation |
|---|---|---|
| 6 Inches | 18 Inches (1.5 ft) | Moderate Bleed Reduction |
| 1 Foot | 3 Feet | Standard Professional Separation |
| 2 Feet | 6 Feet | High Isolation (Requires larger space) |
| 4 Finger-widths | 12 Finger-widths | Desktop/Podcast Standard |
Why Distance Matters: Solving Phase Cancellation
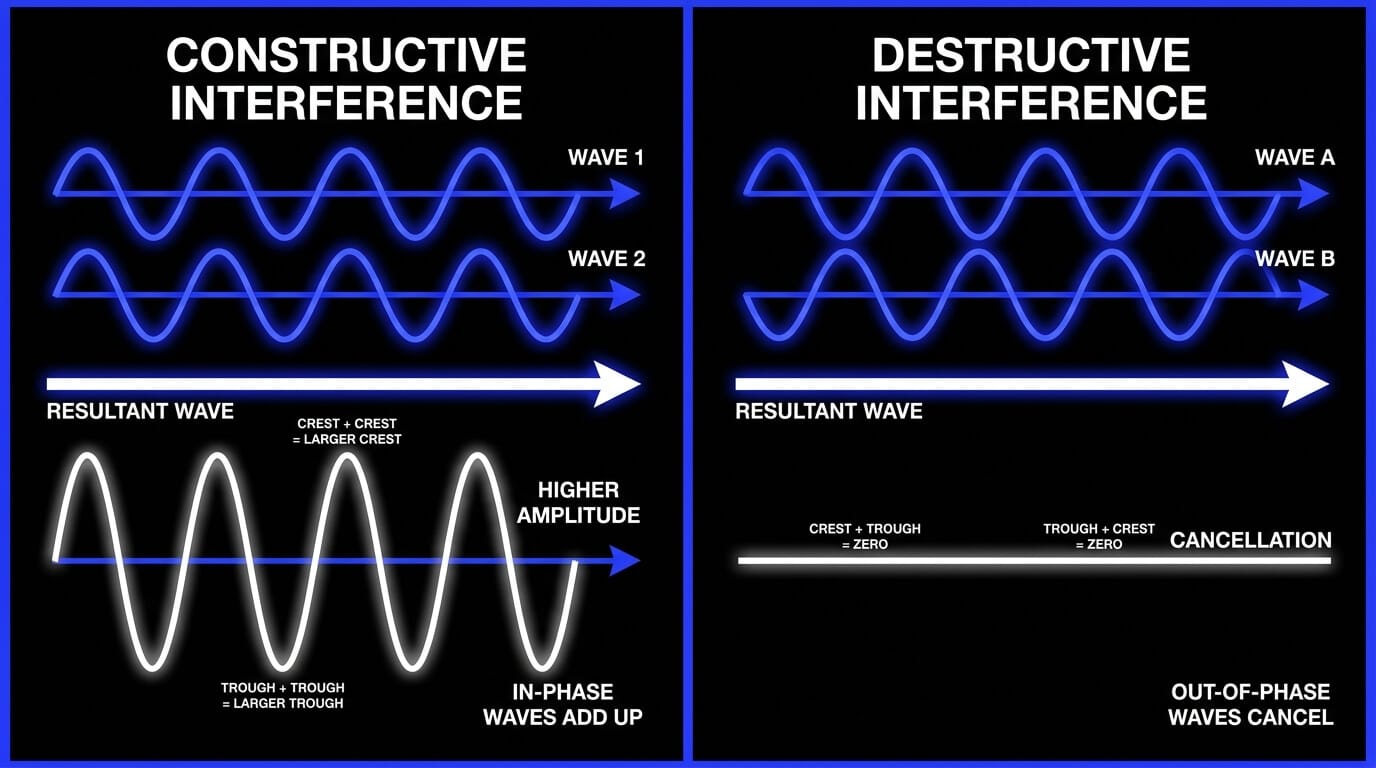
To understand why we follow these microphone techniques, we have to look at the physics of wave interference. Sound travels at a constant speed—roughly 1,130 feet per second. While that sounds fast, it is slow enough that a difference of just a few inches in microphone placement can cause a sound wave to reach one mic while it is at its peak and the other while it is at its valley.
When you combine those two signals in a mixer, the peak and the valley pull against each other. This is destructive interference. The most common result is a phenomenon called comb filtering. If you have ever listened back to a recording and thought the vocals sounded thin, hollow, or like they were recorded inside a plastic pipe, you are likely hearing comb filtering. It effectively "eqs" your sound by carving out notches in the frequency response, and unfortunately, no amount of digital processing can truly "fix" a phase-canceled recording after the fact.
The 3-to-1 rule works because it utilizes the Inverse Square Law in audio engineering. This law dictates that as you double the distance from a sound source, the sound pressure level (SPL) drops by 6 decibels. By moving a second microphone to three times the distance of the first, you are creating a signal level difference of approximately 9 to 12 decibels between the mics. At this lower volume, the "bleed" signal is too quiet to exert a significant negative influence on the primary signal, drastically reducing phase cancellation in audio recording.
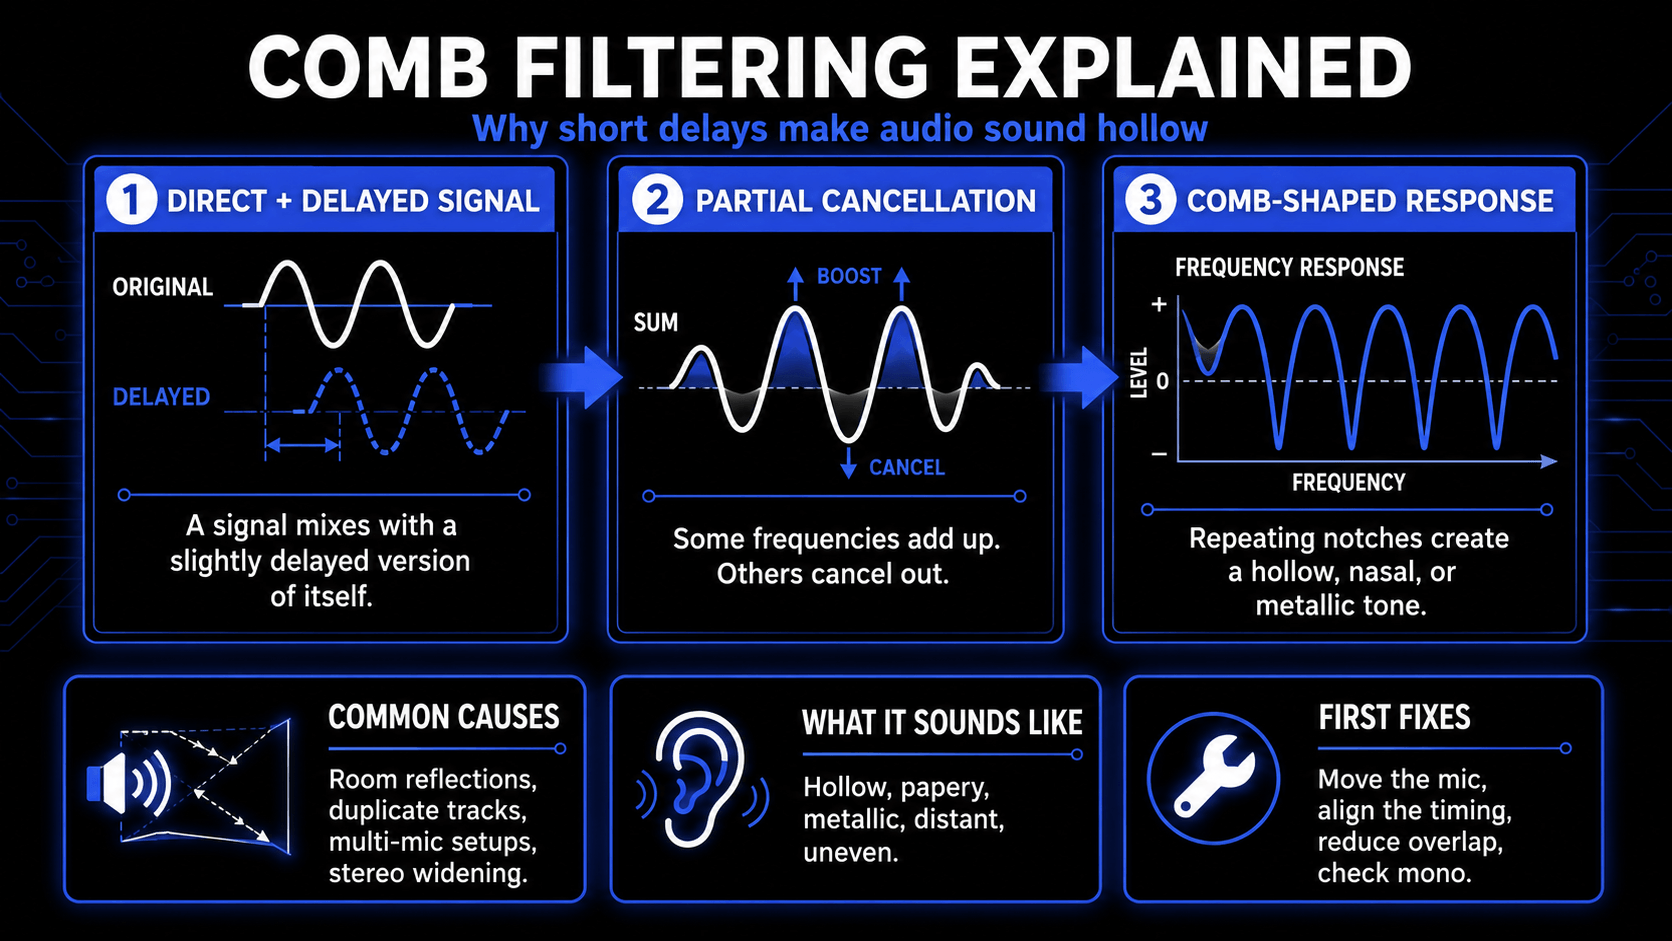
When you are preventing comb filtering in multi-mic setups, you are essentially protecting the "body" of your sound. A phase-coherent recording sounds forward, punchy, and natural. A phase-cluttered recording sounds distant and weak.
Practical Setup: Streaming and Podcast Scenarios
While the 3-to-1 rule originated in high-end music studios, it has never been more relevant than it is today for the home creator. If you are looking for the best mic placement for streaming, especially if you have a guest sitting across from you or a secondary mic for instruments, this ratio serves as your blueprint for success.
In a podcasting environment, we often see two hosts sitting at a small table. If Host A is six inches from their mic, but Host B's mic is only twelve inches away from Host A, you are violating the rule. The result? When Host A speaks, their voice will bleed into Host B’s mic. When you mix the two tracks, Host A will sound like they are talking in a tiled bathroom. To fix this, you have two choices: move Host A closer to their own microphone (decreasing the "1" in the 3:1 ratio) or move the microphones further apart (increasing the "3").
For a vocal microphone placement for podcast interviews, I always suggest starting with the four finger-widths rule. Have the guest place four fingers between their mouth and the microphone grille. If that distance is roughly three inches, then the distance to the next microphone should be at least nine inches. This is a great way to manage best mic placement for streaming with dual microphones when you don't have a tape measure handy.

Keep in mind that while the 3-to-1 rule helps with time-of-arrival issues, your microphone polar patterns also play a role. Using cardioid or super-cardioid microphones allows you to point the "null" (the quietest part of the mic) toward the other sound source, giving you even more sonic clarity.
The Pro's Secret: Measuring Beyond the Grille
One of the most common mistakes I see intermediate engineers make—a "measurement trap" as I call it—is measuring distance from the microphone grille. If you are using professional broadcast microphones like the Shure SM7B or the Electro-Voice RE20, the actual diaphragm (the part that captures sound) is recessed deep inside the body.
If the diaphragm is two inches behind the grille, and you place the grille one inch from the speaker's mouth, your actual distance is three inches. If you then set your second mic based on the one-inch grille distance, your 3-to-1 math will be completely wrong. Always account for the internal depth of your equipment to ensure true phase alignment.
This level of precision is especially vital when considering proper microphone placement for stereo recording or complex multi-track recording. If you are miking a drum kit, for example, the distance between the overheads and the snare must be carefully managed. If the snare drum is 4 feet from the left overhead and 4.2 feet from the right overhead, you will experience a slight "smearing" of the snare sound. In these cases, many engineers use a piece of string to ensure the distance from the snare to each mic is identical, maintaining perfect mono compatibility.
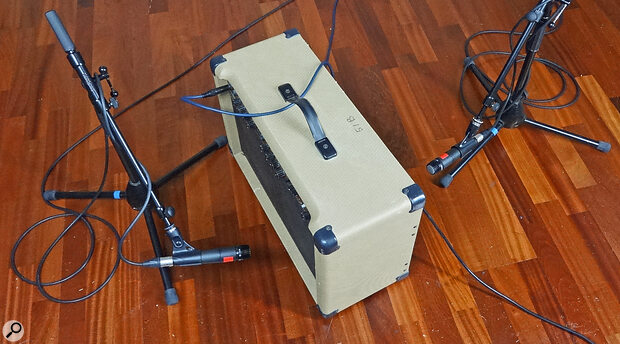
If you find yourself in a situation where the 3-to-1 rule is physically impossible to maintain—perhaps in a tiny home office—you may need to use a polarity flip. This button, found on most audio interfaces and DAWs, rotates the phase of the signal by 180 degrees. While it isn't a substitute for good microphone placement, it can sometimes "un-cancel" waves that are perfectly out of sync.
Testing Your Sound: Fuller vs. Thinner
At the end of the day, your ears are more important than your tape measure. After you have set up your microphones following the 3-to-1 rule, you must validate the sound. The gold standard for this is the "Check in Mono" workflow.
When you listen to two microphones in stereo (one panned left, one panned right), phase issues can be hard to hear because the interference is split between your ears. However, when you sum those tracks to mono, the destructive interference becomes glaringly obvious. If the sound becomes thinner and loses its low-end punch the moment you hit the mono button, you have a phase issue.
| Symptom | Probable Cause | Immediate Fix |
|---|---|---|
| Hollow, "nasal" vocal tone | Comb filtering from nearby mic | Increase distance to 3:1 ratio |
| Soundstage shifting to one side | Uneven distance in stereo pair | Re-measure source-to-mic distance |
| "Phasing" or "Wooshing" sound | Moving sound source | Use tighter polar patterns or move mic closer |
| Distant, echoing quality | Excessive signal bleed | Use physical baffles or closer miking |
For those who want to be even more precise, many Digital Audio Workstations (DAWs) include correlation meters. These visual software tools allow you to see the phase relationship between tracks. If the meter is pinned to +1, your mics are perfectly in phase. If it dips into the negative numbers, you are experiencing phase cancellation and need to adjust your microphone placement.

Mastering these nuances is what separates a bedroom demo from a professional production. By respecting the 3-to-1 rule, you ensure that every instrument and voice has its own space in the frequency spectrum, leading to a mix that is clear, powerful, and ready for any sound system.
FAQ
What is the 3 1 rule for mic placement?
The 3-to-1 rule is a technique where the distance between two microphones should be at least three times the distance between each microphone and its respective sound source to prevent phase cancellation.
What is the 3 to 1 rule for microphones?
It is a mathematical guideline used to reduce signal bleed and comb filtering. If Mic A is 1 foot from Speaker A, then Mic B should be at least 3 feet away from Mic A.
What is the first rule of microphone placement?
The first rule is often considered to be getting the microphone as close to the target sound source as possible while maintaining a natural tone. This maximizes the signal-to-noise ratio before you even worry about the 3-to-1 rule.
How far should a mic be from the face?
For most podcast and vocal applications, a distance of 3 to 6 inches (about 4 finger-widths) is ideal. This provides a balance of intimacy and clarity without overwhelming the capsule with "plosive" air blasts.
Should the mic be above or below the mouth?
Ideally, the microphone should be slightly off-axis—either just above the lip line pointing down or slightly to the side. This prevents the "p-pops" caused by direct breath hitting the diaphragm while still capturing the full resonance of the voice.